
Designing any space can feel daunting and overwhelming for so many. The most common struggle I hear is: I don’t know how to put it together to feel cohesive and I don’t even know where to start. In this post I am sharing all my tips on where to start, how to plan, and how to pull it together.
We are in Week 7 of the spring ’24 One Room Challenge and I can see the finish line! Let’s dive in.
*This post contains affiliate links. That means, while it’s the same price for you, I get a very small commission out of it that helps me and my family. But most importantly, helps fund my estate sale and coffee addiction.
Pick a vibe for your space
The start to designing any space is to pick how you want the room to feel. Warm & cozy? Bold & modern? Moody & serene? Also consider how this room will function. Will it entertain? Is it a place for family gatherings? Is it a place to sit with friends and converse? Is it a bedroom to retreat to at the end of the day? All these things will come into play with the feel of the room. Write (or jot in notes on your phone)down descriptor words for all of these things so you can start to see where it is going.
Since this room is my 12 year-old’s bedroom, he wanted less of a “kid-like” feel and more of “teen” feel. He wanted it to have things in it that showed his personality and things he loves. So we started there. Some will call this the “theme”, but let’s not get carried away with themes. Read about designing a themed room here. I like to say ”look & feel” because themes are often so overdone.
Here is the list we came up with for his likes and the feel he wanted:
- hunting
- moody
- vintage
- Desk for schoolwork
- Functional
- Less toys
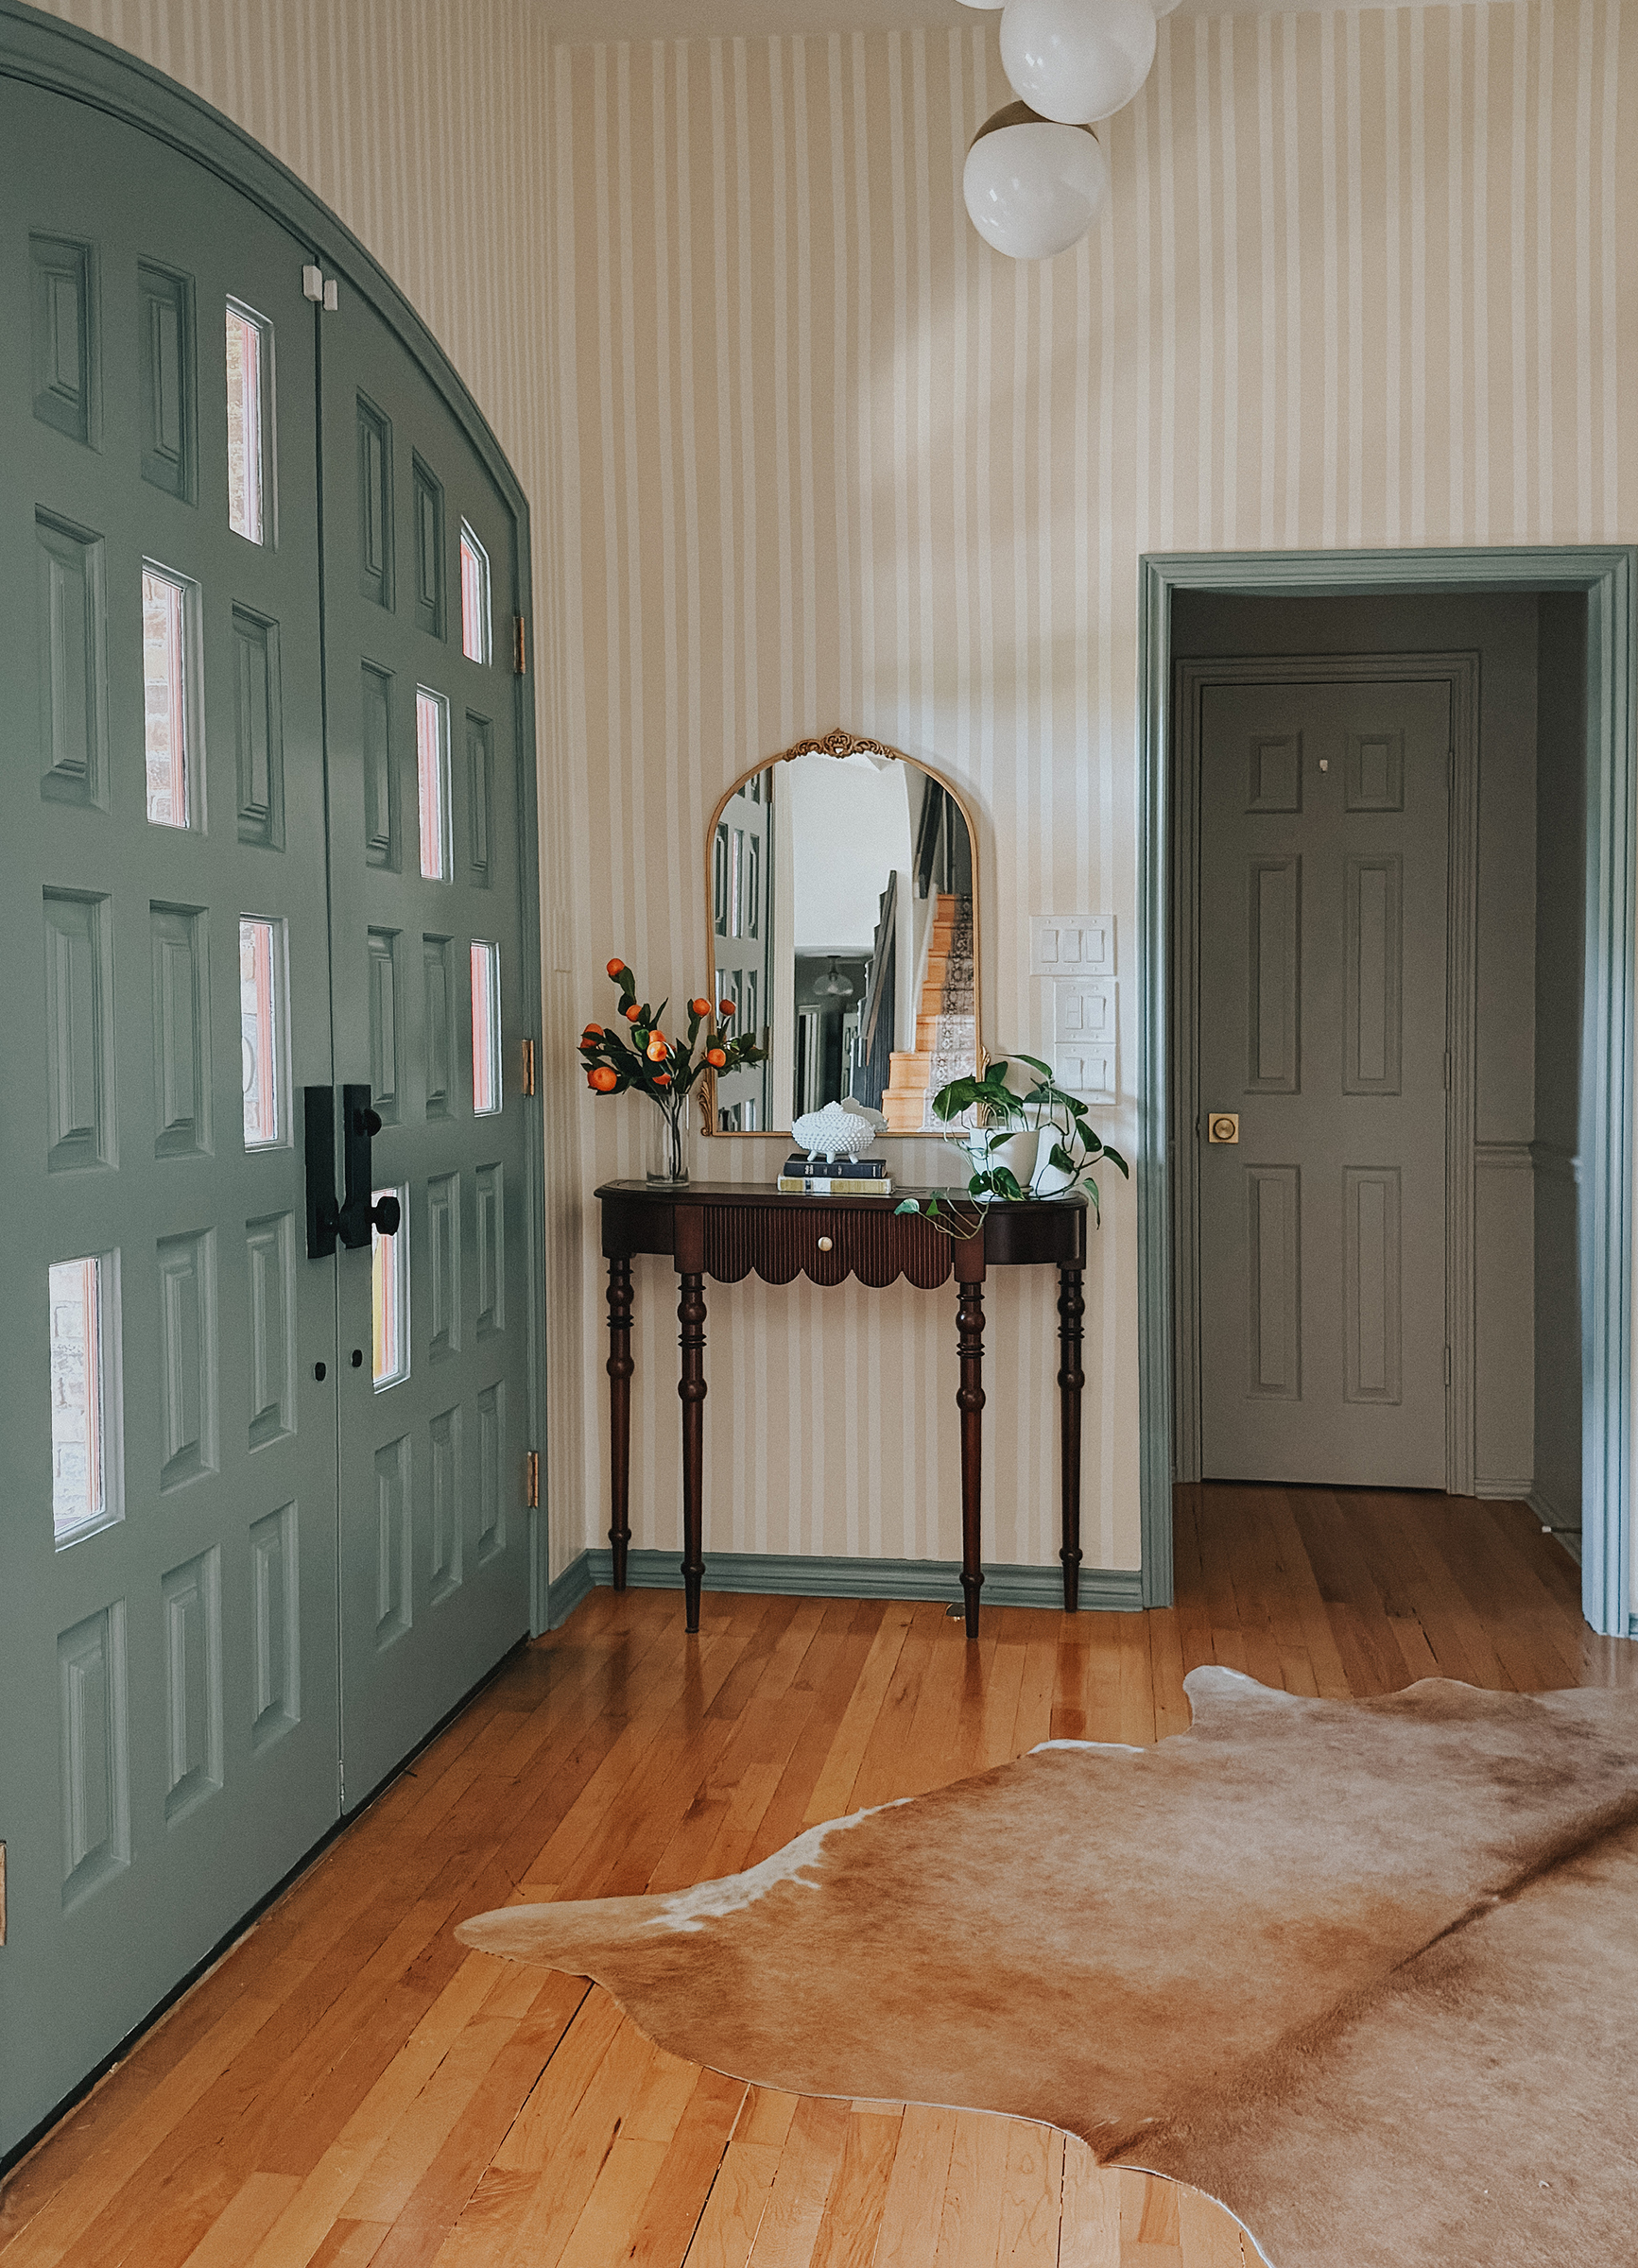
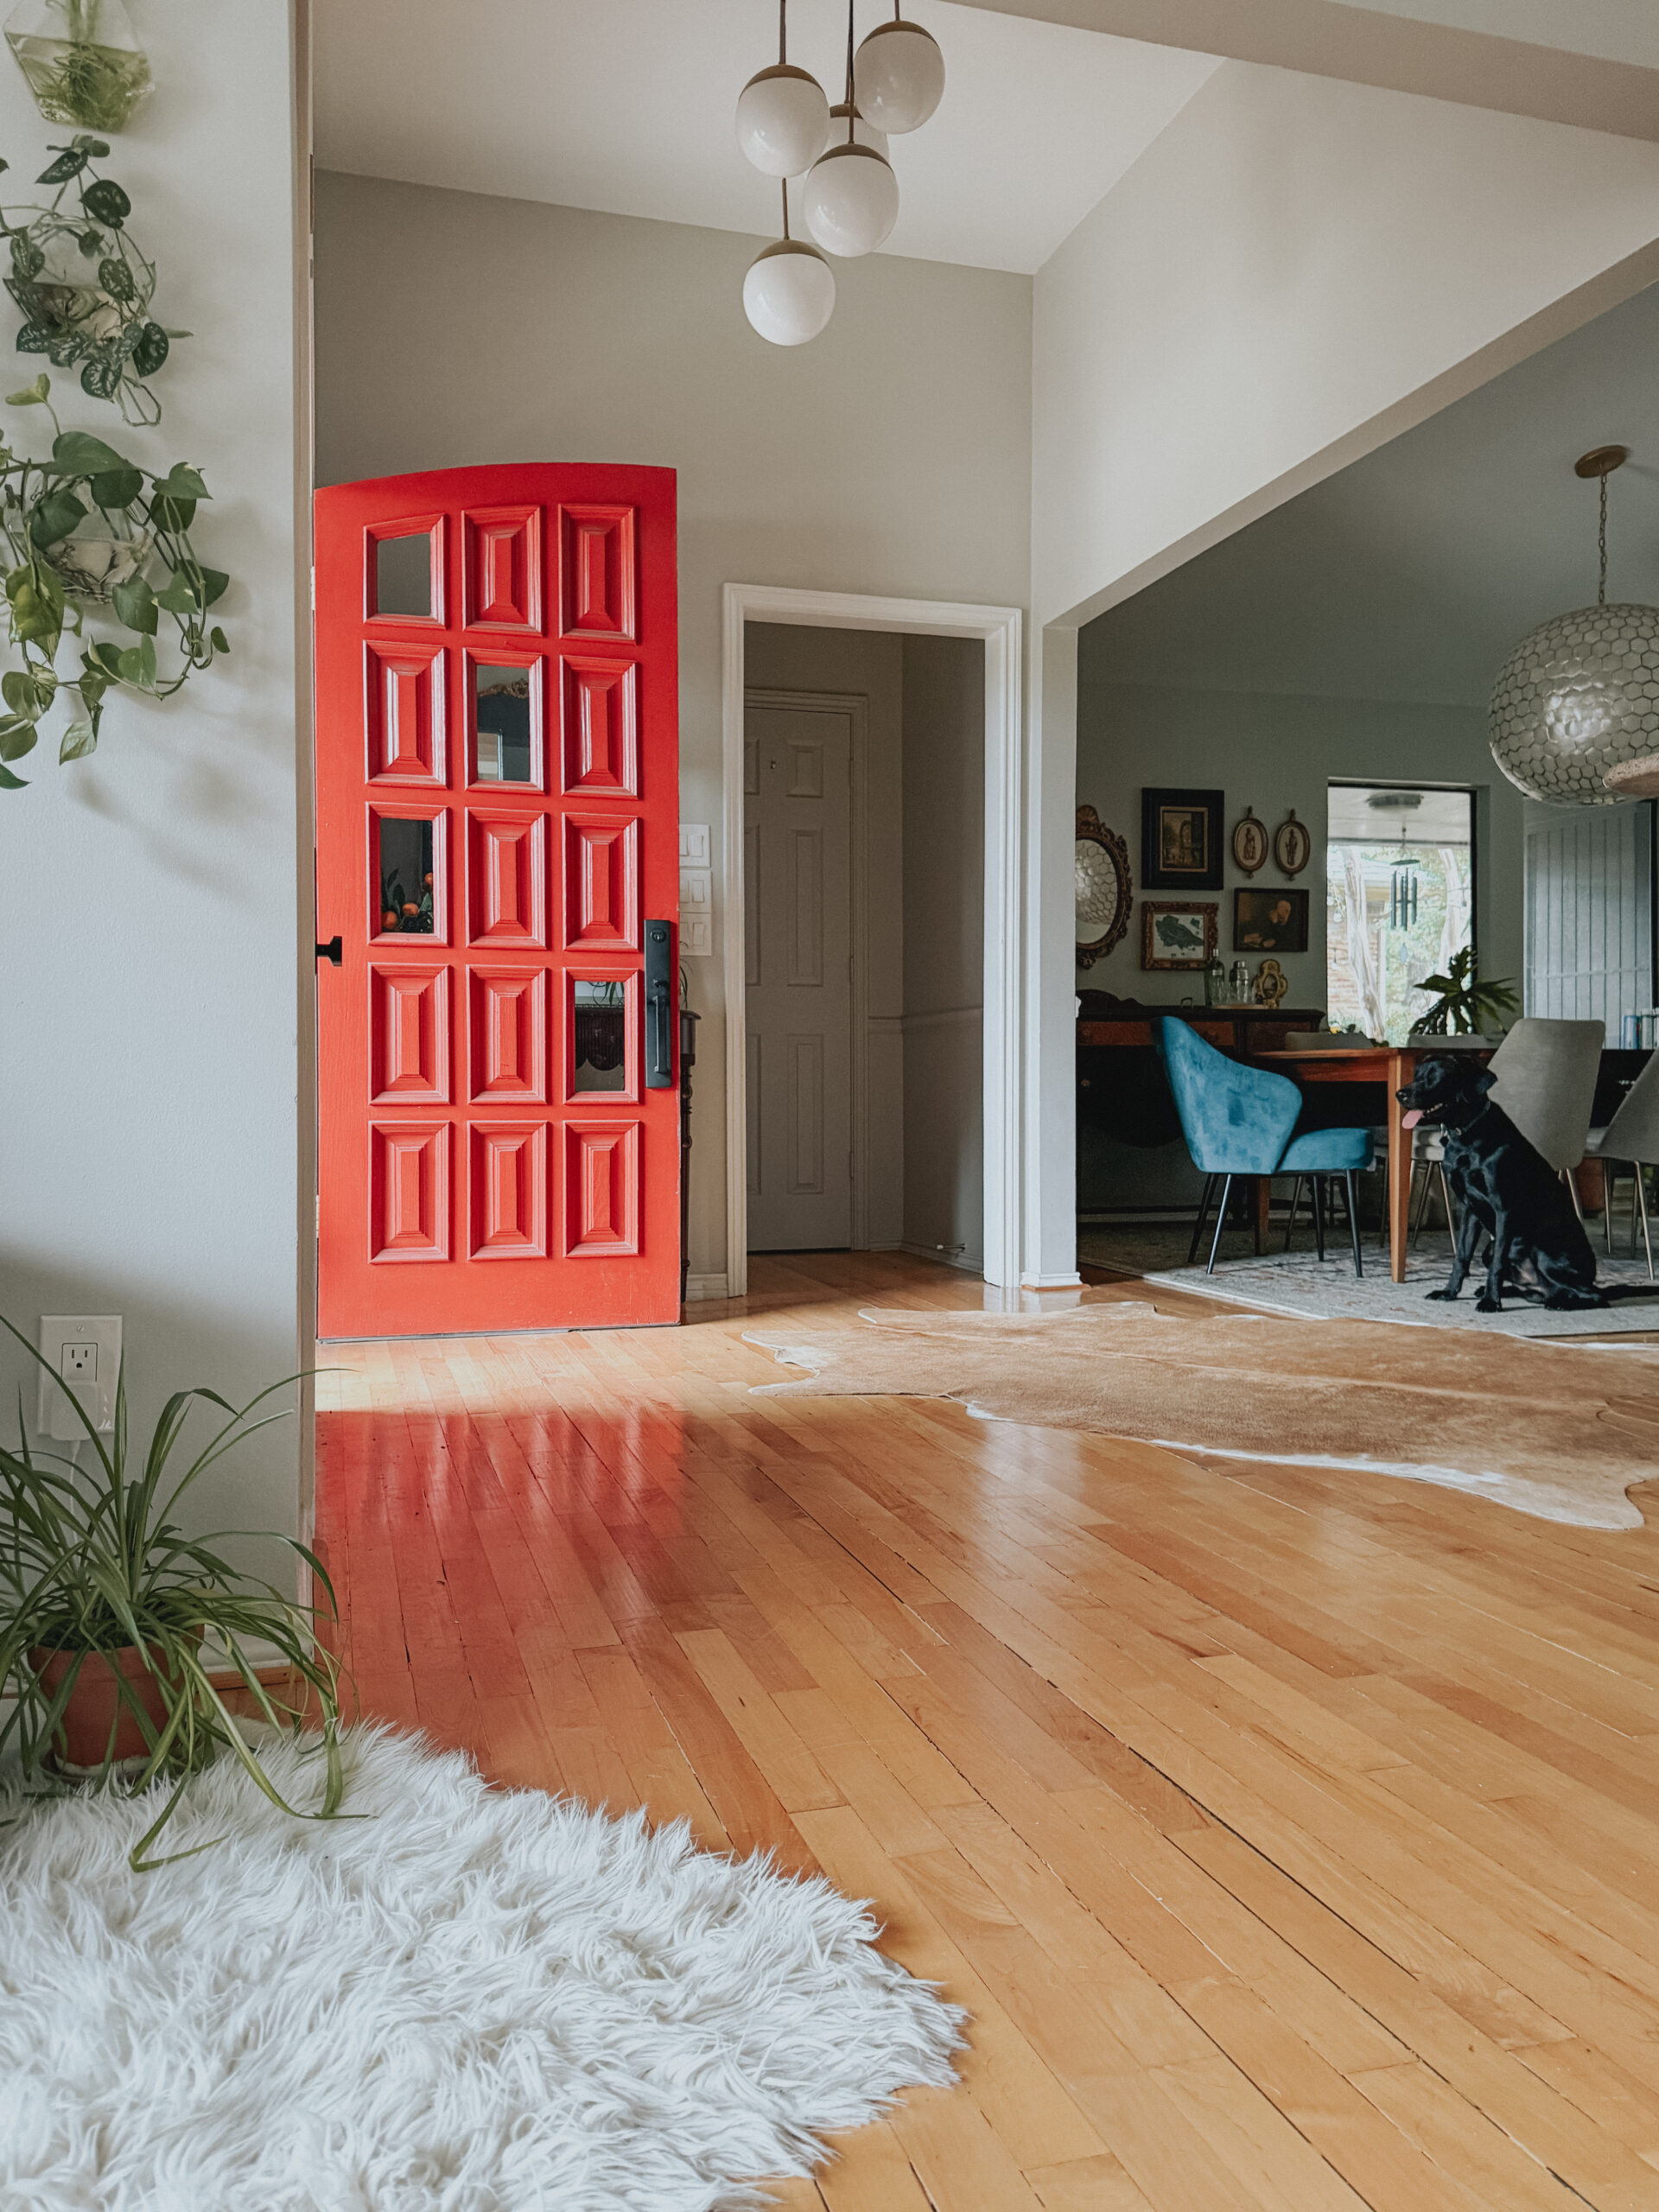
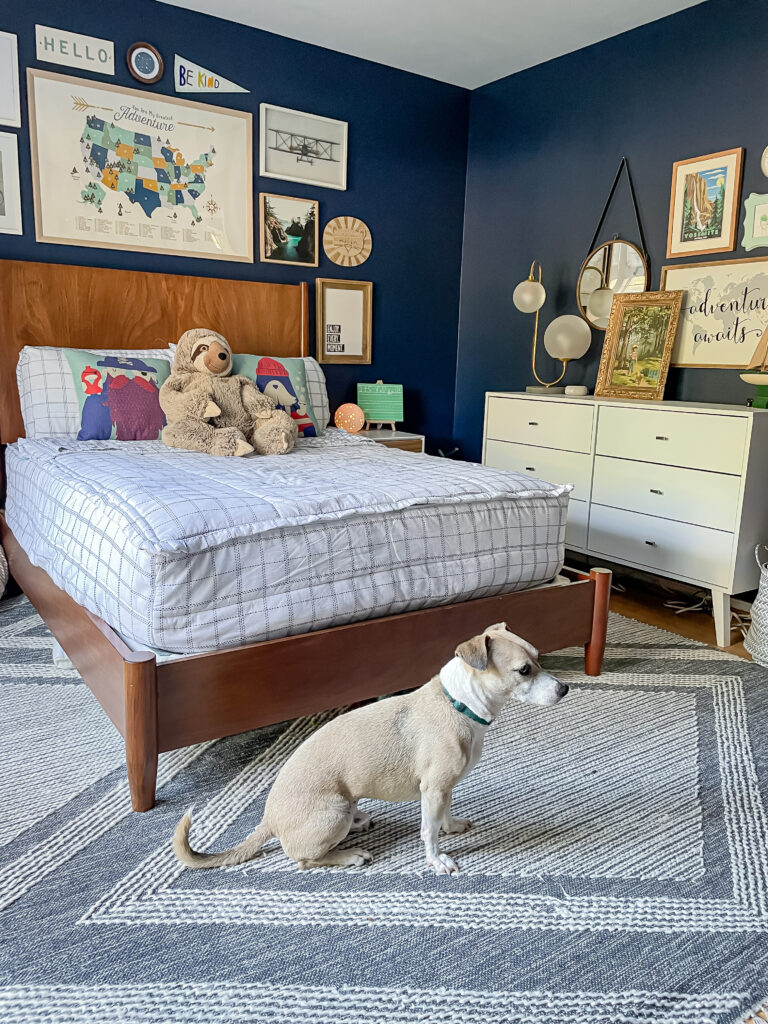
For a reminder, here is where we started. (most of these items are thrifted or no longer sold so I do not have links)
Head to Pinterest or magazines for inspiration
The first step after you have your list is to head over to Pinterest, social media, books, magazines or wherever you gather your inspiration. If you can cut out images, save images in a folder online, or create a Pinterest board this will be helpful. Just pick rooms with the look & feel from your list and rooms that depict your descriptor words. Don’t think about not liking colors, etc we’ll tackle that later. Just the ones that fit your vibe.
After you’ve saved at least 10-15 images, go back and look for elements that are repeating. You may not even notice there are repeating elements. Oftentimes people don’t realize what the love until they start this process. This might be gallery walls, certain fabrics, patterns, textures, shiplap walls, etc. You will gather all these into a new folder or board because these are the elements you will use in your space.
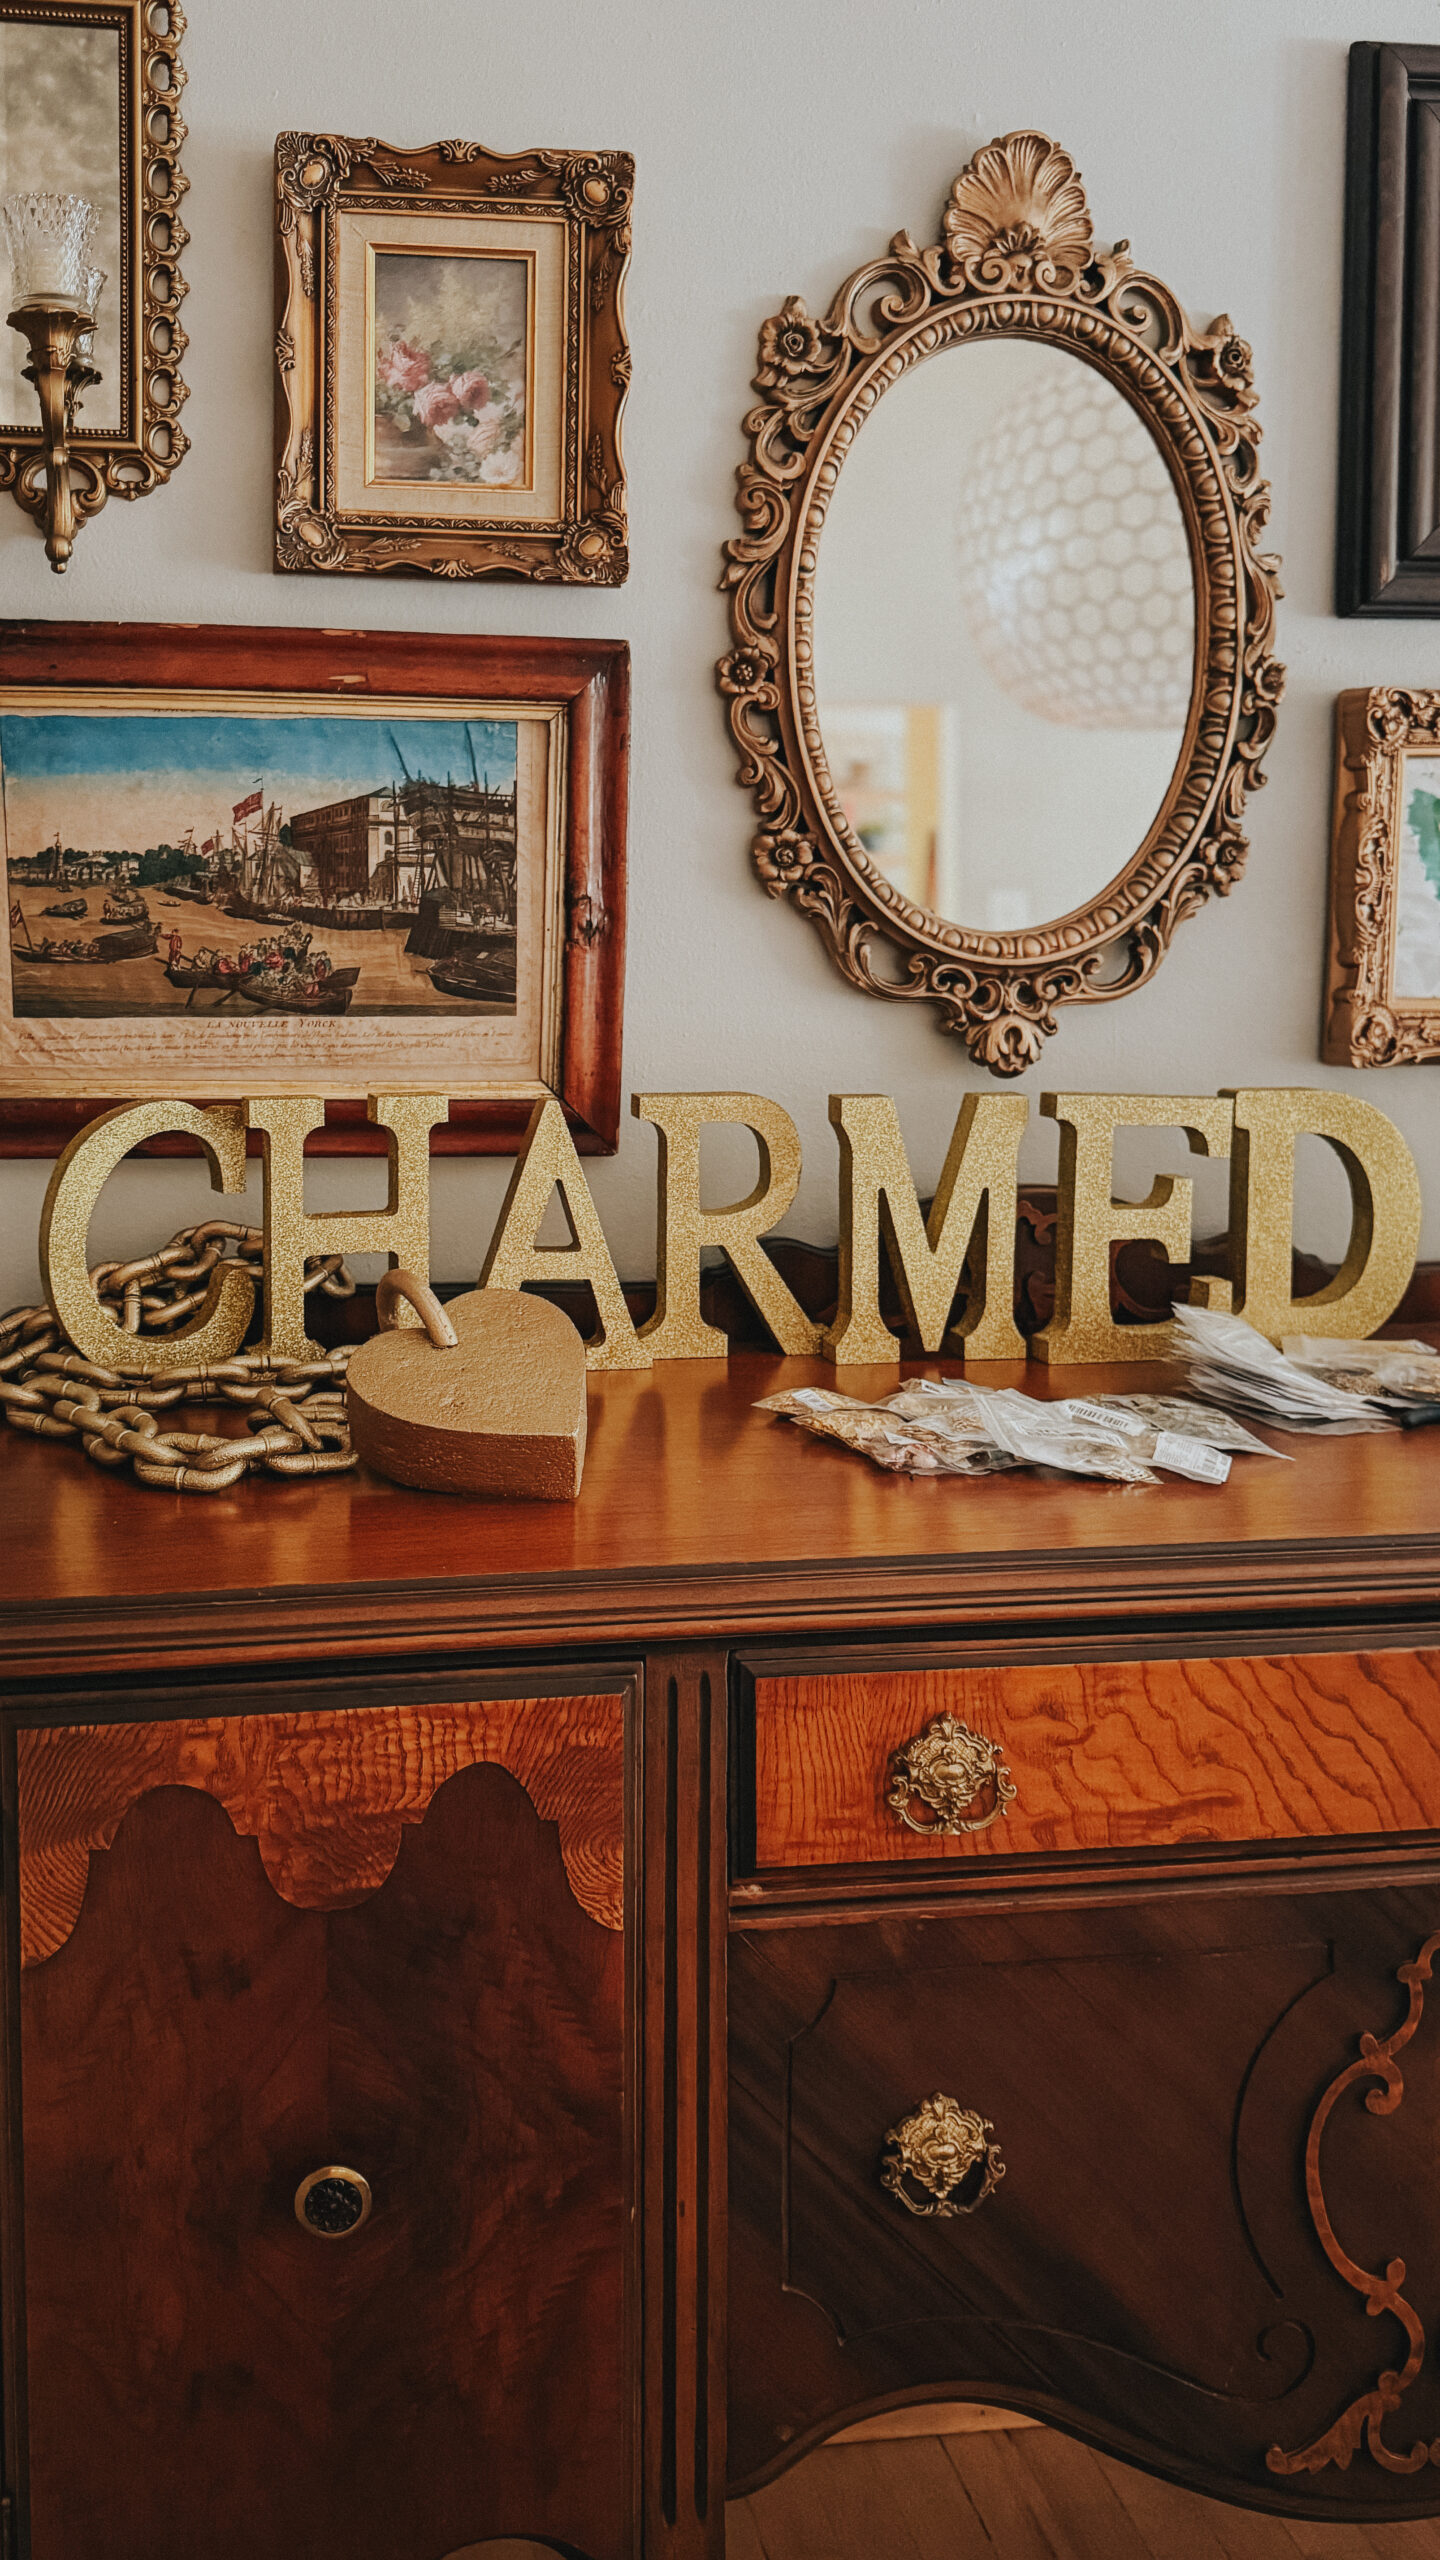
As you can see below, in my inspo board I was saving moody, gallery walls, antique frames, leathers, woods and rich colors. That is where I started the next step.

Create a mood board
(click image for links) Start pulling products that fit the common elements that you found in the previous step and putting them into a mood board. I use Canva. It is free, but the paid version allows you to remove the background from images so you can see what they look like in a room. I already knew since we chose moody that I would color drench the room. I started to gather vintage art from estate sales, antique stores and Facebook Marketplace that would fit the aesthetic we wanted.
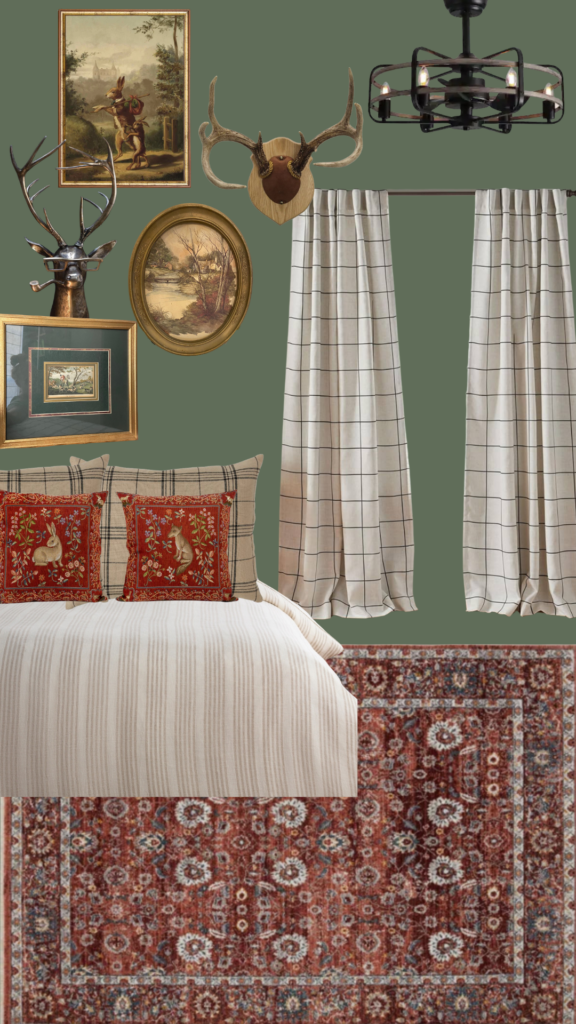
Here is a mood board I started with. I added the art I collected and picked a fandelier and vintage rug to fit our vintage feel. More on picking room color next.
You can add in your furniture, window treatments and all the elements in your room to see how they look together. When you do this you can eliminated pieces that may not work well together. I went through 4 rugs before I found one with a red that I think worked best.
Picking color
Picking a color for your room is usually where people freeze. If you go back to the feel and vibe of your room, it will help you choose your color. If you want warm and cozy go for warm colors such as earth tones or warm neutrals. You can also do cozy in a moody room, but to be moody you’ll want to consider richer colors like deep reds, purples, warm deep colors. For light and modern you might lean into light neutrals such as creamy whites. Also lean in to colors that you like. If you like bold and fun, don’t be afraid to choose fun, bold colors.
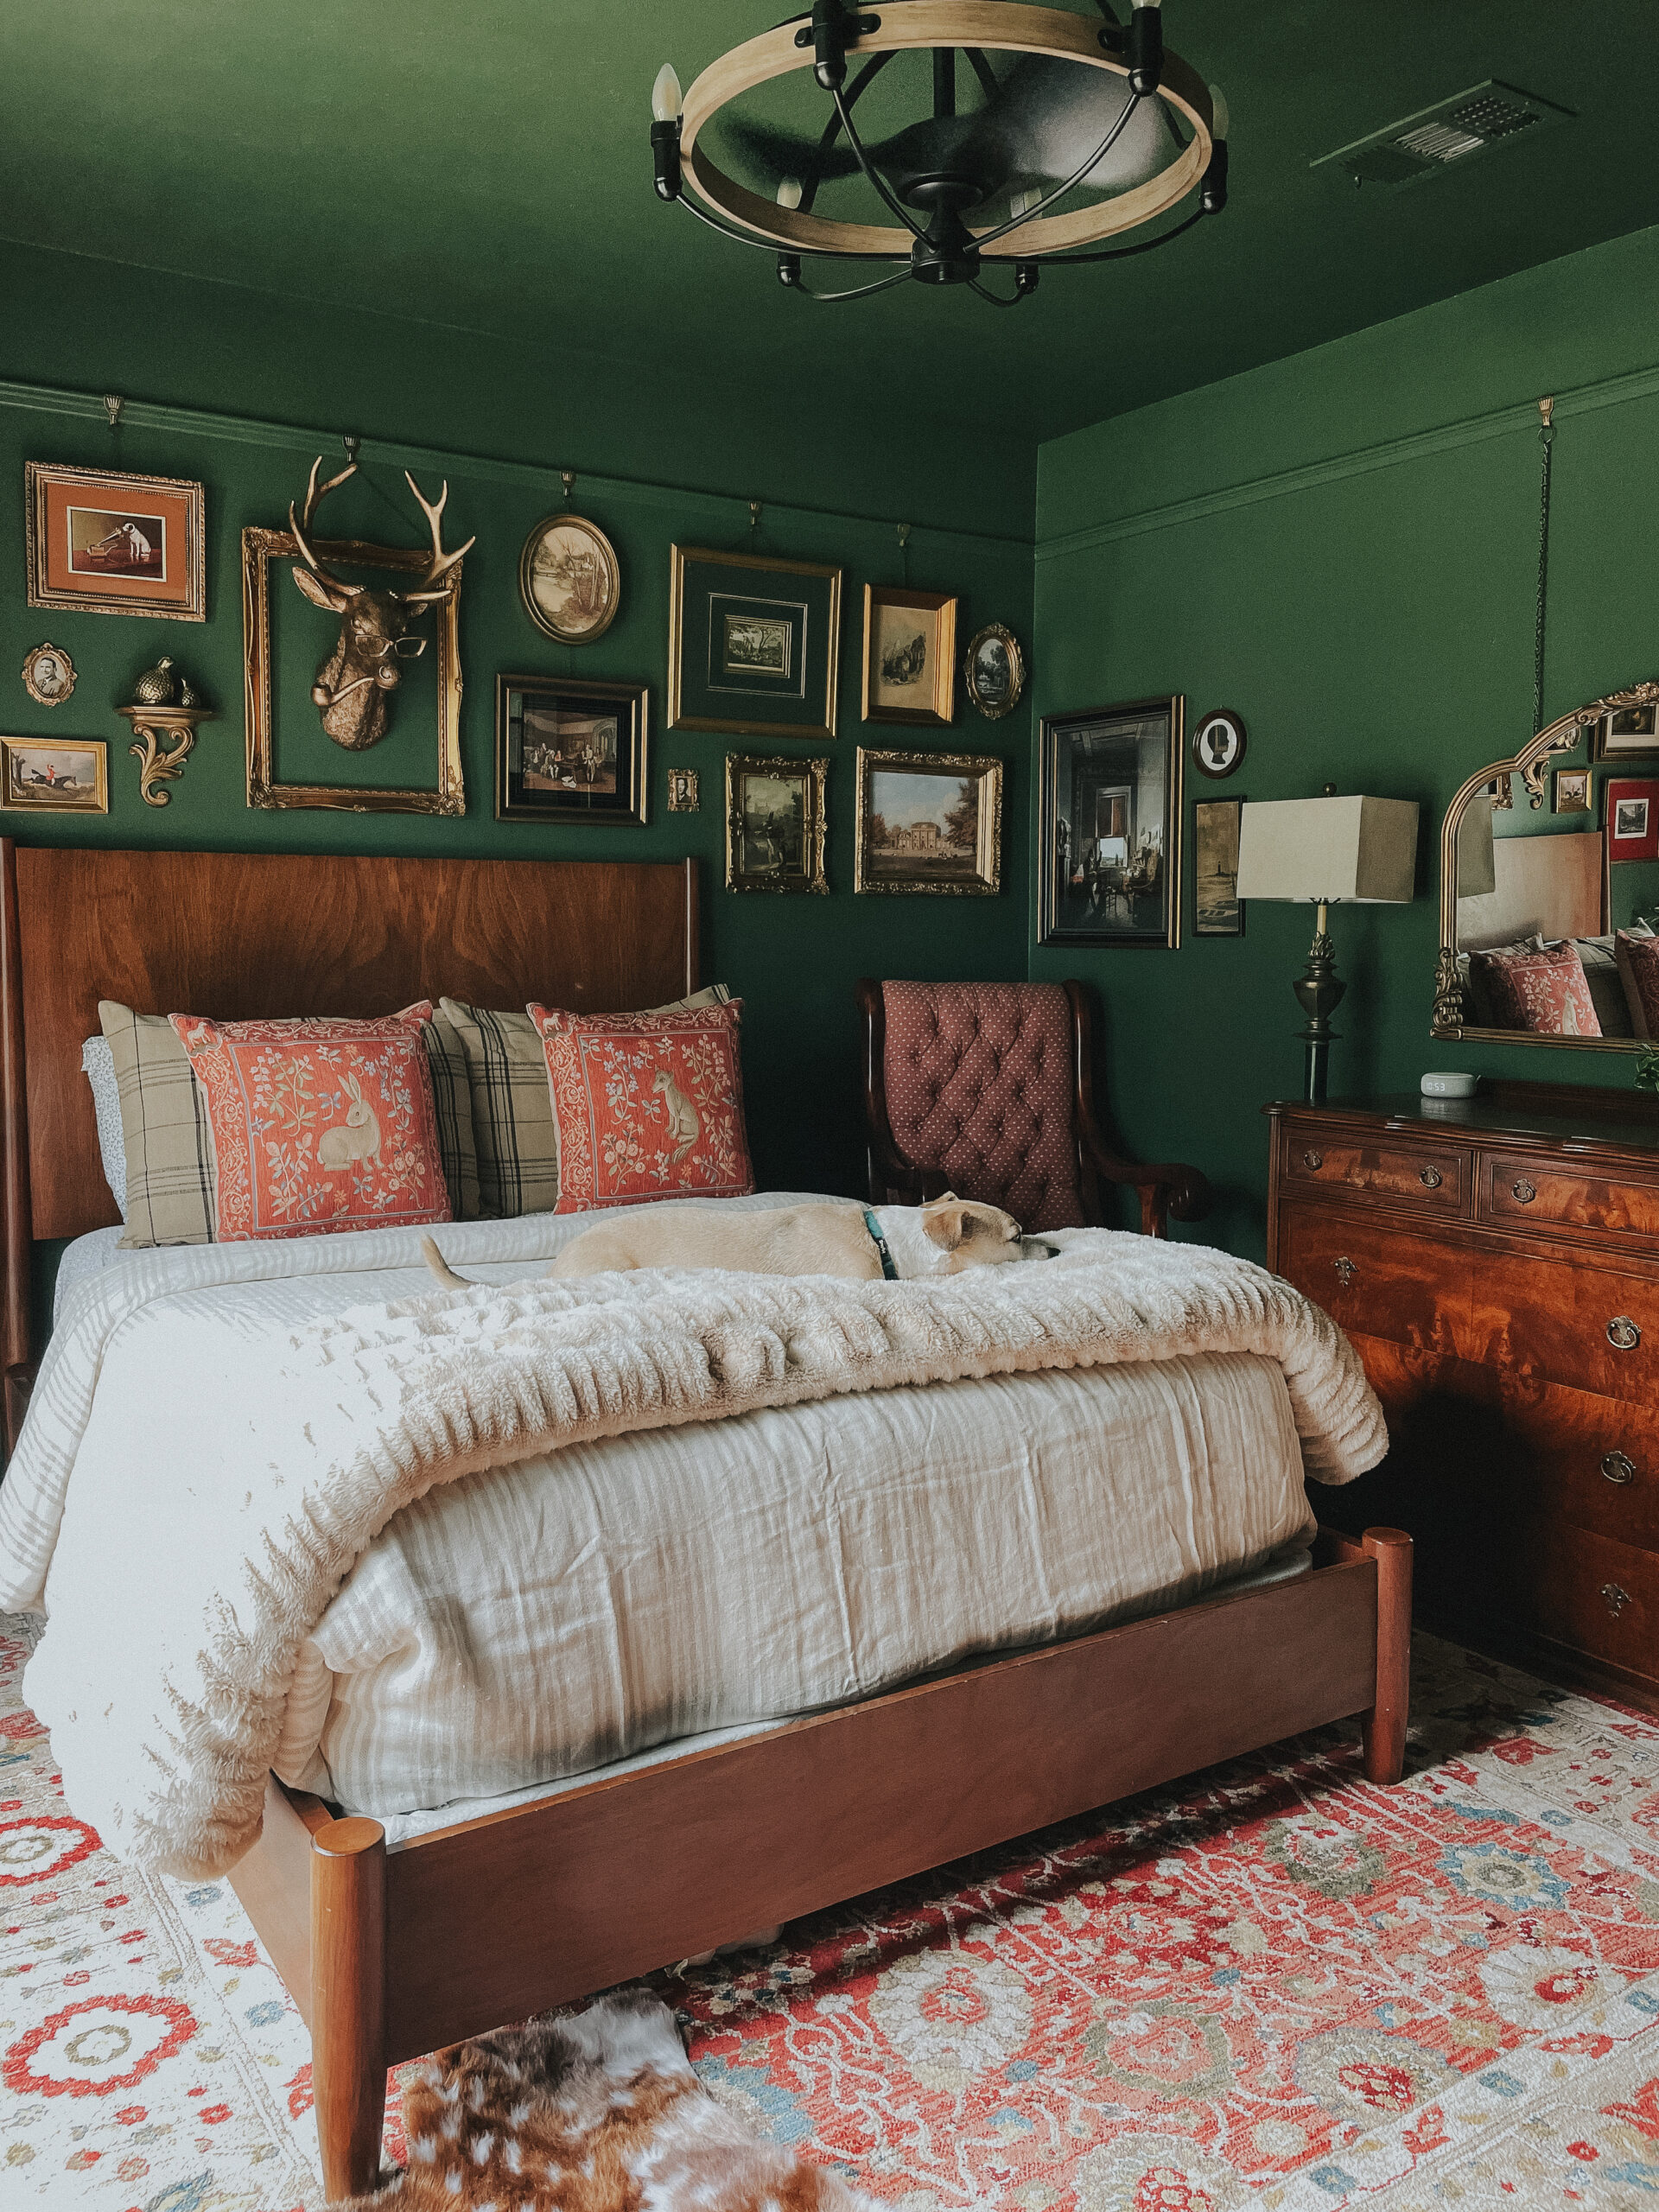
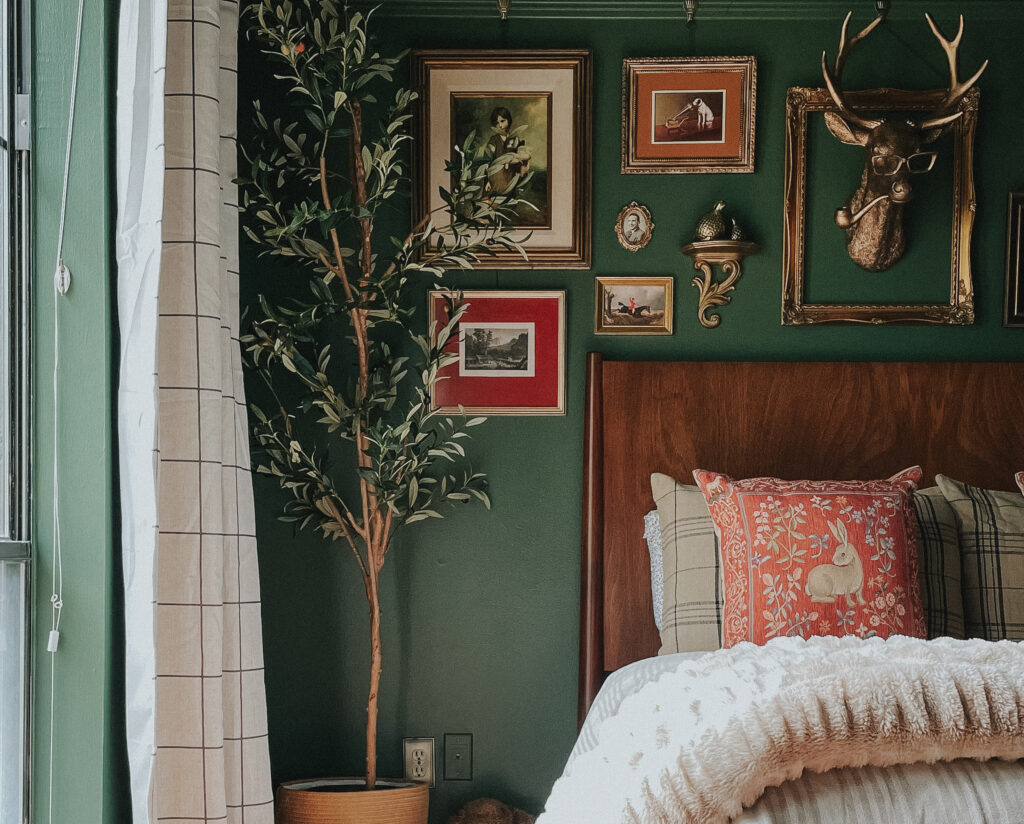
There is a design “equation” that many designers use and that is 60-30-10 rule. 60% of the room will have the main color. 30% the secondary color and 10% for accents. In this room we went with green for our 60. Now I could have chosen monochormatic and done all different shades of greens in the curtains, rug and bedding. But….the mood and vibe (back to step one) told a different story. We also wanted vintage. And remember our inspo boards? There was a lot of green and, truth be told, I‘m in my green era, sooooo…it was perfect!
I mentioned you can do monochromatic for your 30 & 10, but there are two other choices too. You can do colors next to each other on the color wheel, which is analogous. So for green it would be either way: yellow and orange or blue and violets. OR you can do colors opposite each other on the color wheel–called complementary colors–which would be reds. Where some people get stuck is thinking of only the primary colors on the color wheel. But you also need to consider all the shades in between those colors! I didn’t pick a stop sign red. I used muted, deep burgundy red for the vintage feel we were going for. This was our 30.
Our 10 is brass/golds and woods. It is in accents and some furniture. I think it works perfectly in this room for great cohesiveness.

Space planning & layout
The most important step is laying it all out in the room. For a rule of thumb think of the space you are designing like a scale. It needs to be somewhat (not perfectly) balanced in the way of furniture. Try to avoid putting all the bigger pieces of furniture on one side of the room. If you think of it as a scale, if the heavy furniture was more on one side it would lean on the scale. To help visualize your layout, measure your room including doors and windows. If you are gifted in sketching go ahead and draw it out or lay it out in a graphics program like Illustrator to scale. Websites usually always have measurements on all products so you can then draw out your pieces and place them in your sketch or computer. There are also free layout programs such as Spoak where you can place everything in the room and move it around to see what works and where.
Patterns
For choosing patterns in window treatments and rugs always use the bigger/smaller rule I live by. If you use a big pattern in the rug you’ll want to use a small pattern in the curtains and vice versa. This makes the patterns complement each other but not compete. This also applies to bedding pattern and pillow patterns.
I hope this mini crash course in designing a room was helpful and now you can get started on your first or next space design!
Here is the final reveal of the room with before and after shots. And, as always, leave a comment or visit my services page on the website if you need more help designing a room.