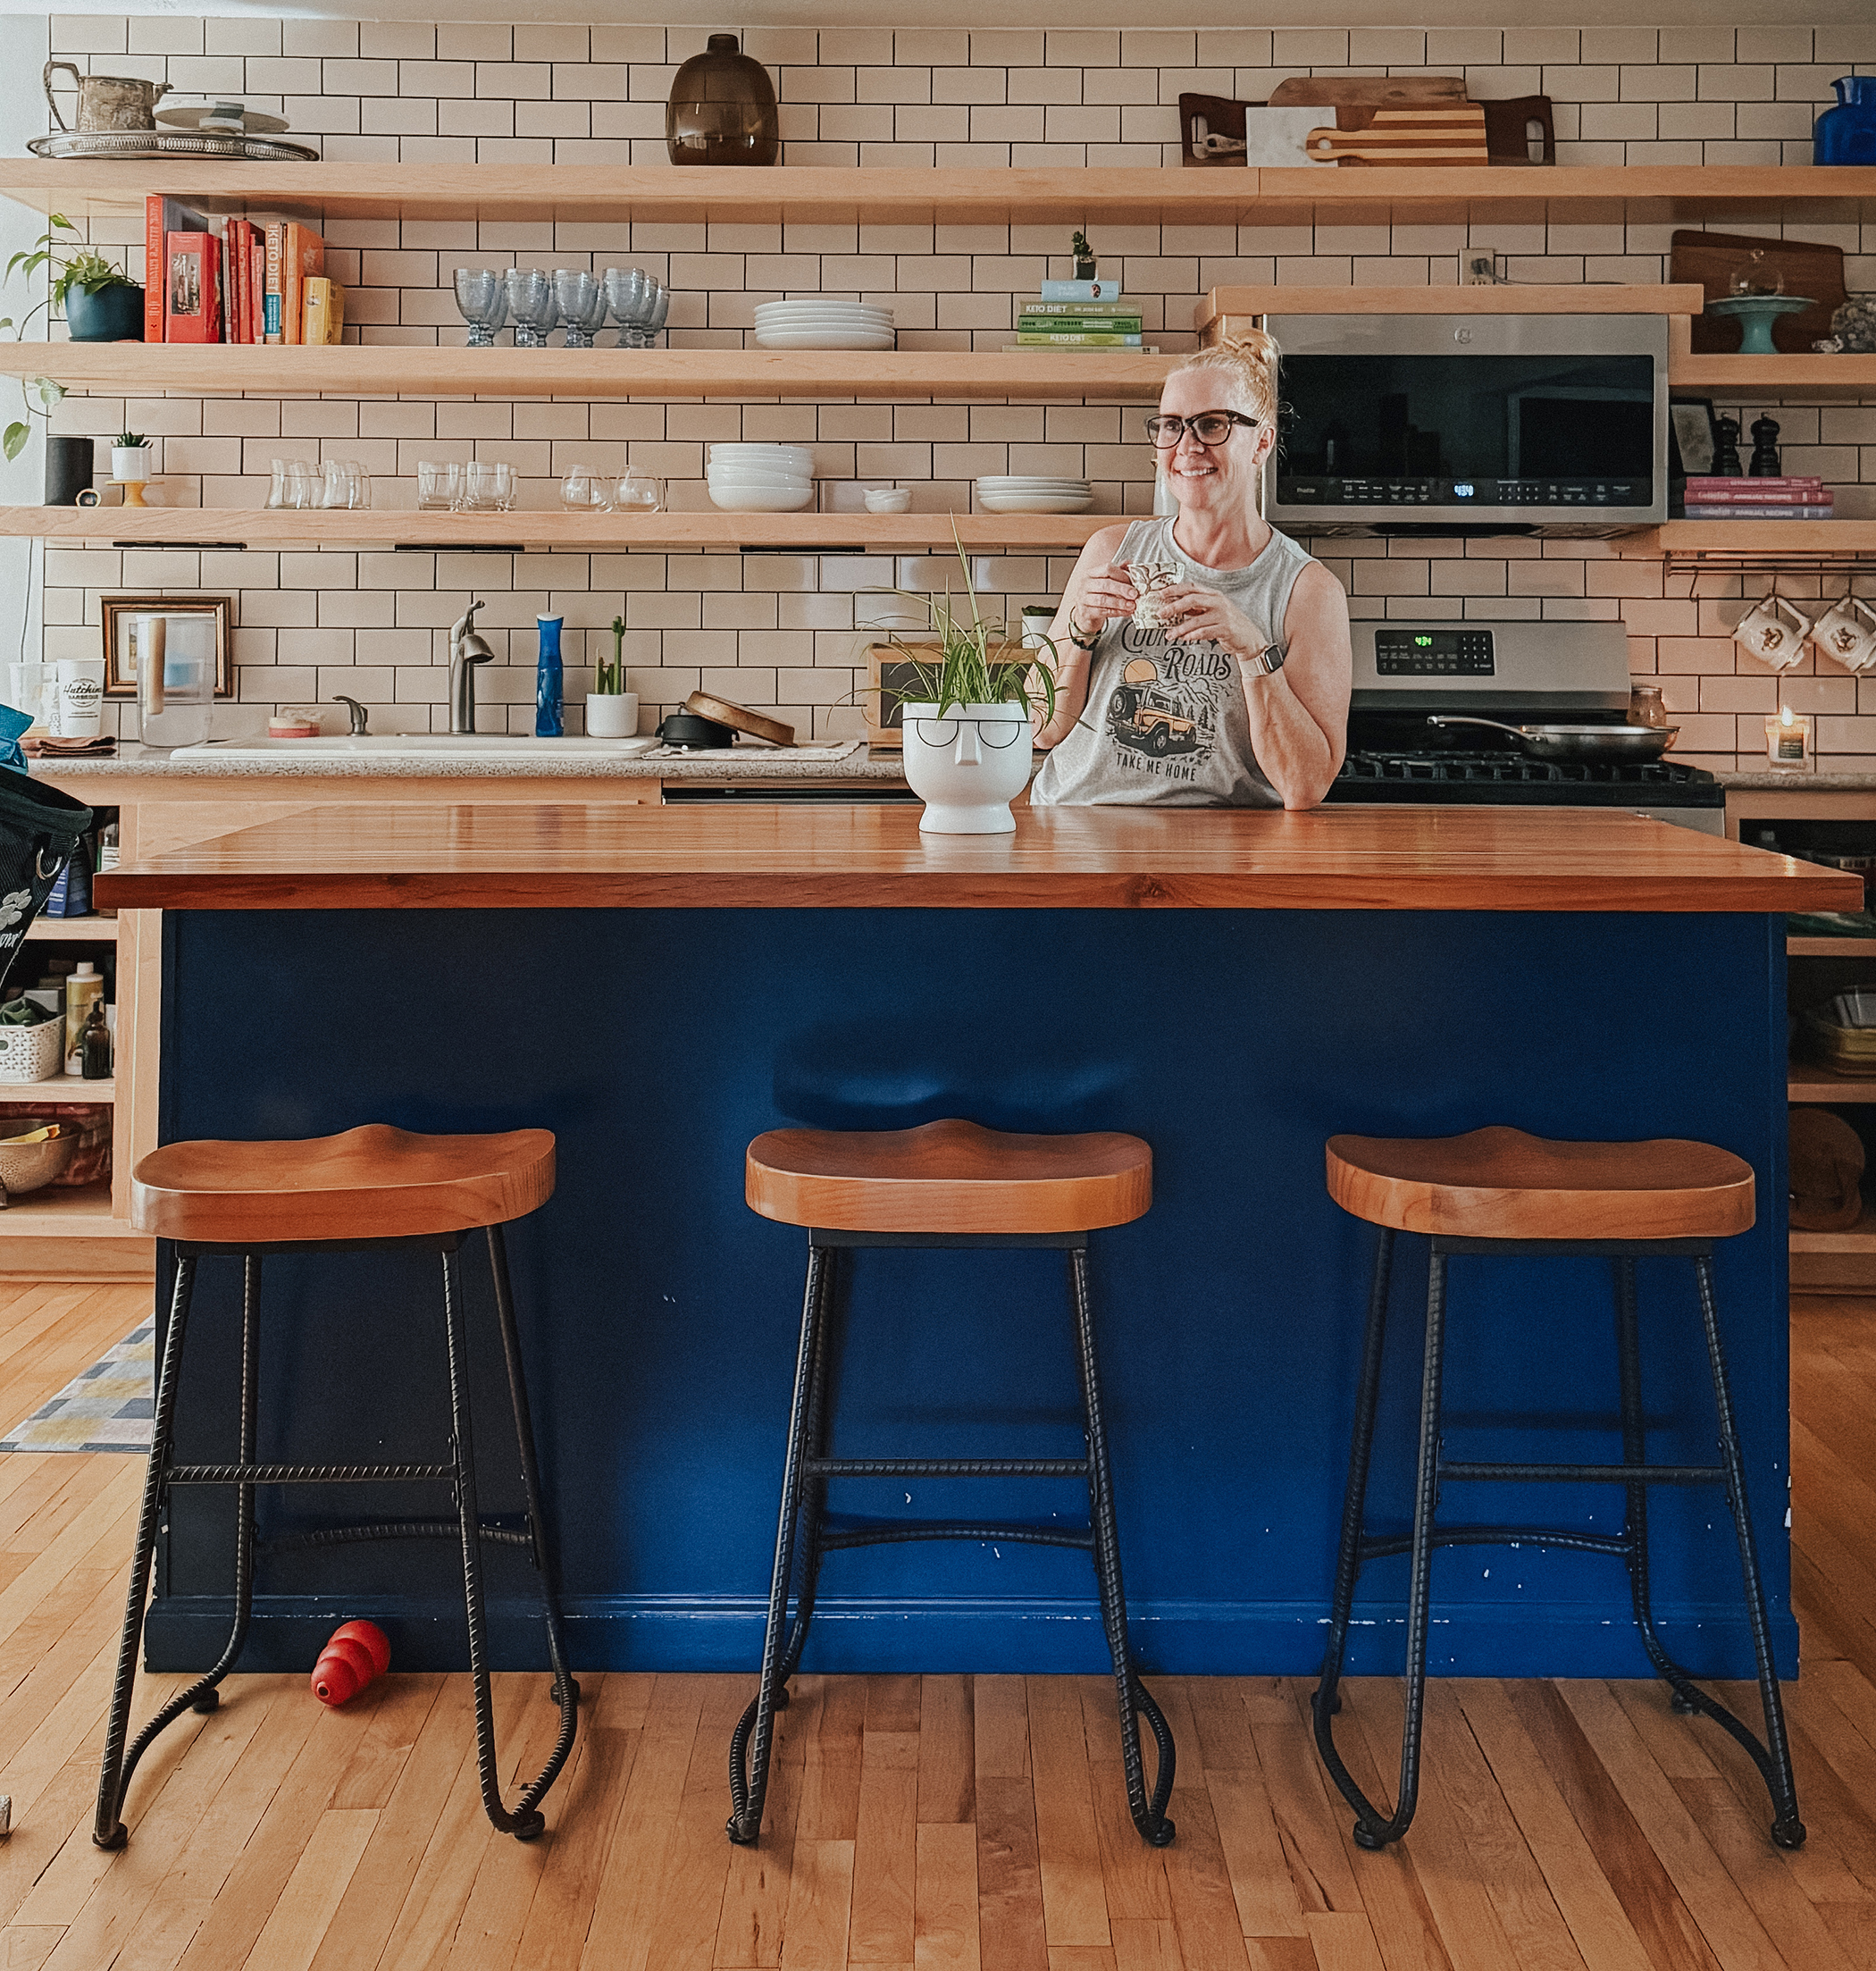
An easy $104 kitchen island makeover using paint, decorative molding, and vintage-inspired hardware.
When we bought our house, there was a big, empty space in the middle of the kitchen.
No island. Nothing.
So we built one.
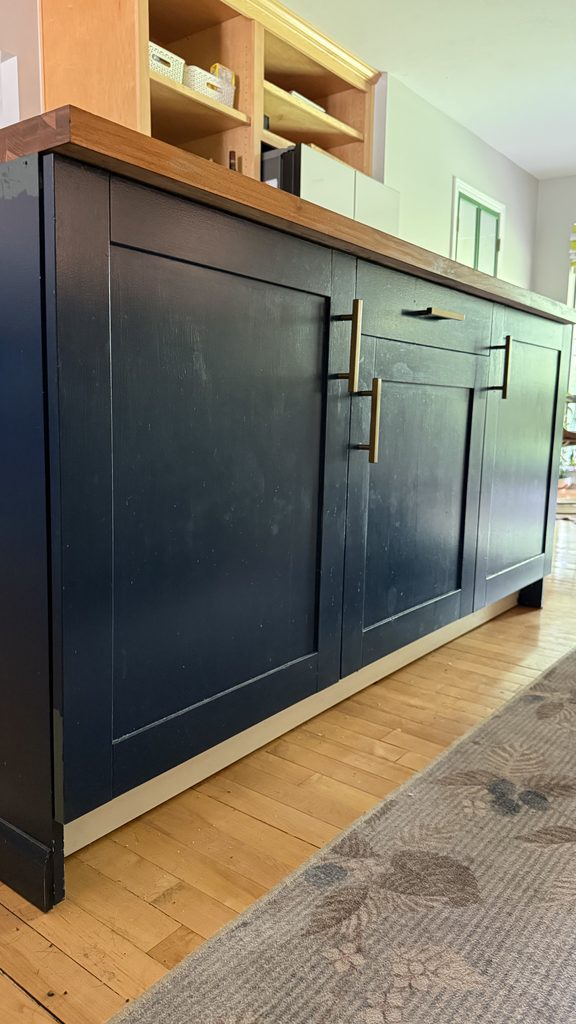
We used IKEA cabinets, added an MDF backing and trim around the base, topped it with butcher block, and painted the whole thing navy.
And I loved it!
At the time, we had navy in our bedroom and office, so apparently I was going through a navy phase. LOL.
But over the last few years, my decorating style has started to change.
I’ve been incorporating more vintage pieces, mixing old and new, layering patterns, and choosing things that feel collected rather than perfectly coordinated.
First came the Ruggable runner. Then the café curtain under the sink. Then my DIY vintage fabric photo mats and lampshade.
And suddenly, every time I looked at the island, something felt off.
The navy wasn’t bad. The island wasn’t bad.
It just didn’t feel like it belonged in the kitchen I was creating anymore.
So I decided to give our kitchen island a little makeover. Starting with paint. Simple enough, right?
Simple enough, right?
Well, then I started staring at those Shaker cabinet doors.
And you know how that goes.

The $15 detail that changed everything
The more I looked at the island, the more I realized it wasn’t just the color that felt too modern.
It was the doors and hardware, too.
I started wondering how I could make the cabinets look a little more traditional without replacing perfectly good doors.
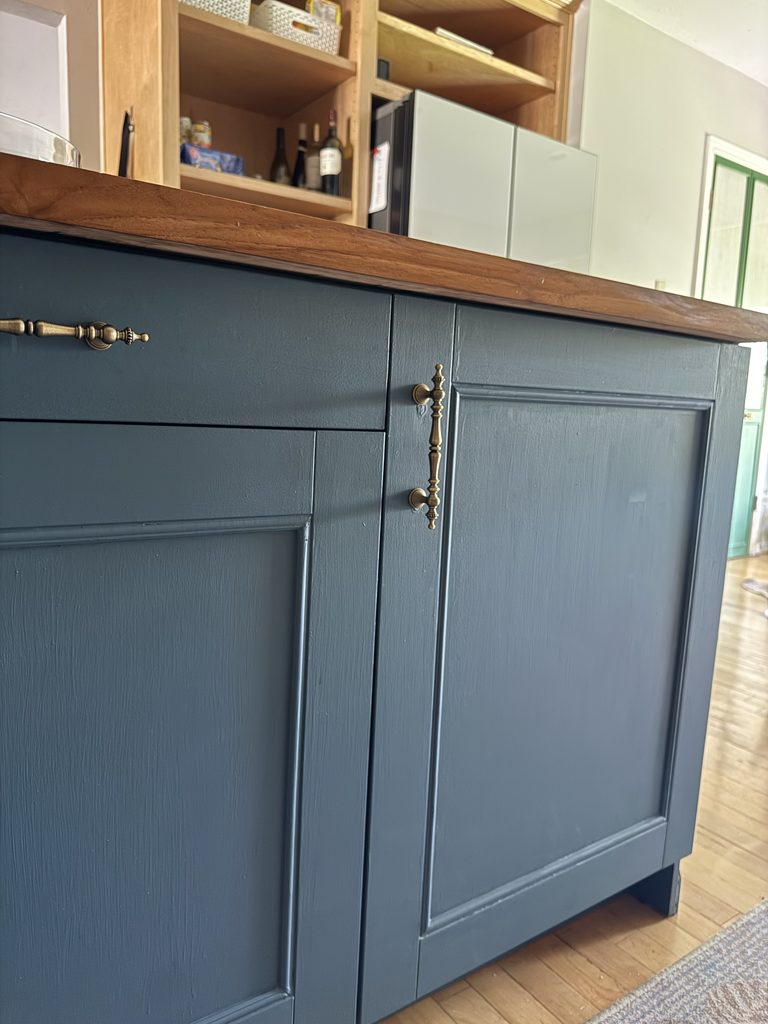
Then I remembered the tiny decorative molding I’d used on our DIY pantry door makeover.
I still had some left over, so I grabbed a piece to see if it would fit inside the recessed panel of the Shaker door.
It fit perfectly.
And that’s when my little paint project became something else entirely.
I bought more molding for about $15 and got to work.

How I added molding without power tools
This might be my favorite part of the entire makeover because it made such a difference, and I didn’t have to use a single power tool.
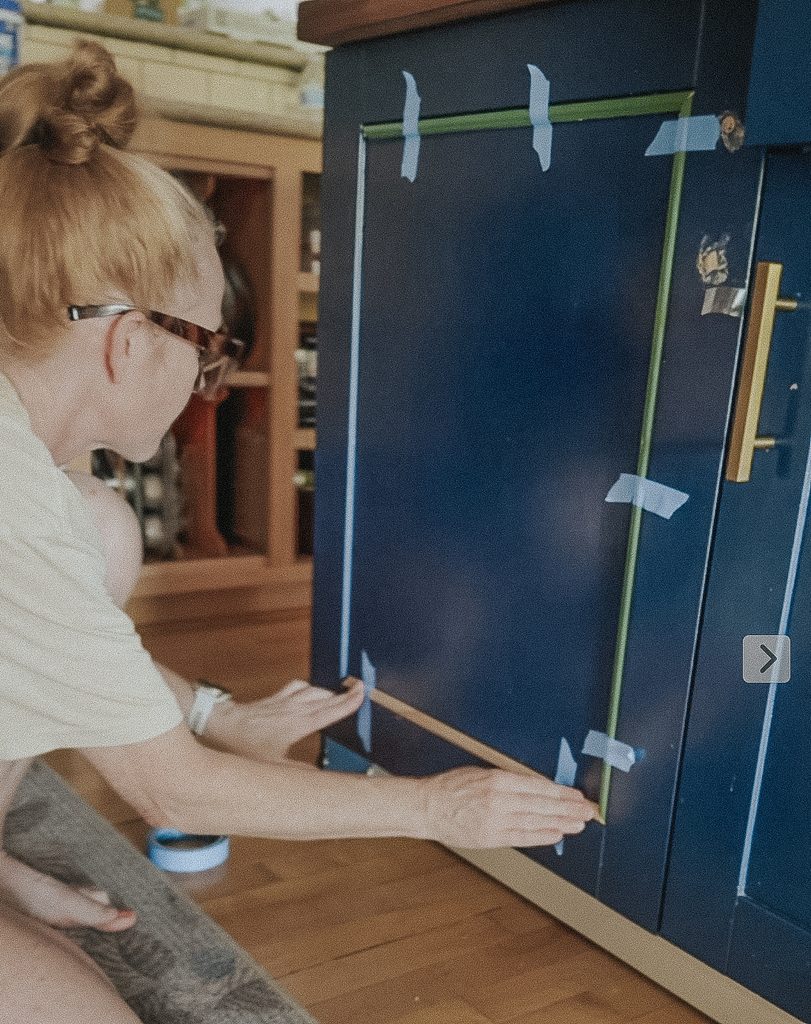
Because the molding is so small, I could cut the corners using my miter shears.
No miter saw required.
Then I attached the pieces with wood glue.
Yep. Wood glue.
I think people seriously underestimate how strong wood glue can be when it’s used on the right surfaces.
After applying the glue, I used painter’s tape to hold the molding in place while it dried.
No nail gun. No power saw. No complicated installation.
Just a few inexpensive supplies and a little patience.
A quick note: This method worked for my doors, but wood glue is generally designed for bonding wood surfaces. If your cabinets have a slick factory finish or laminate coating, check whether your adhesive is compatible before trying this.
Choosing a paint color that can’t make up its mind
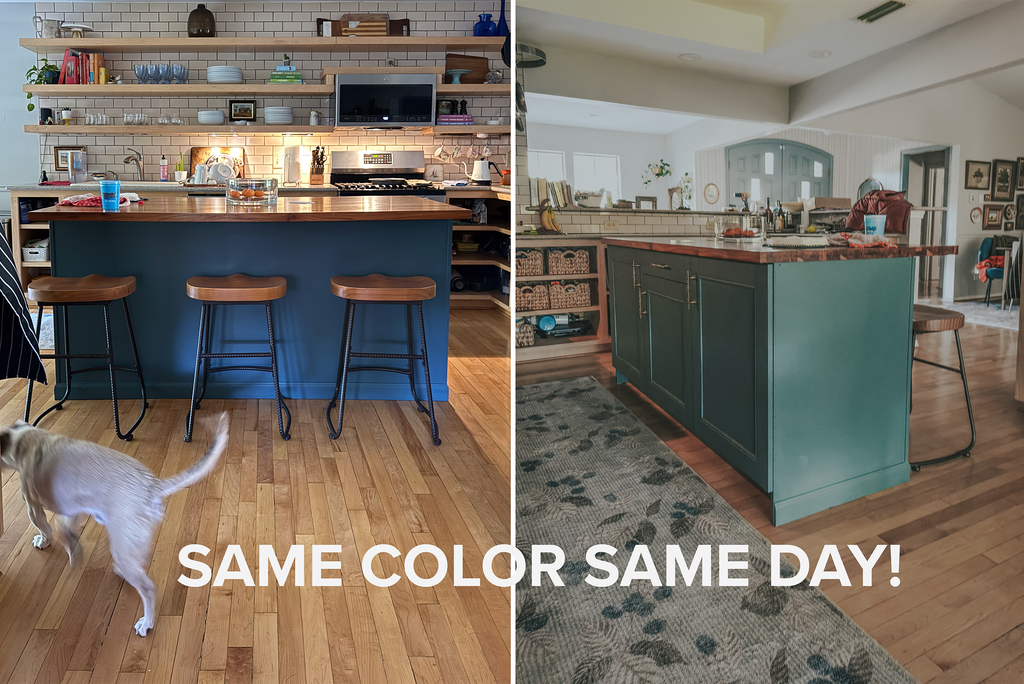
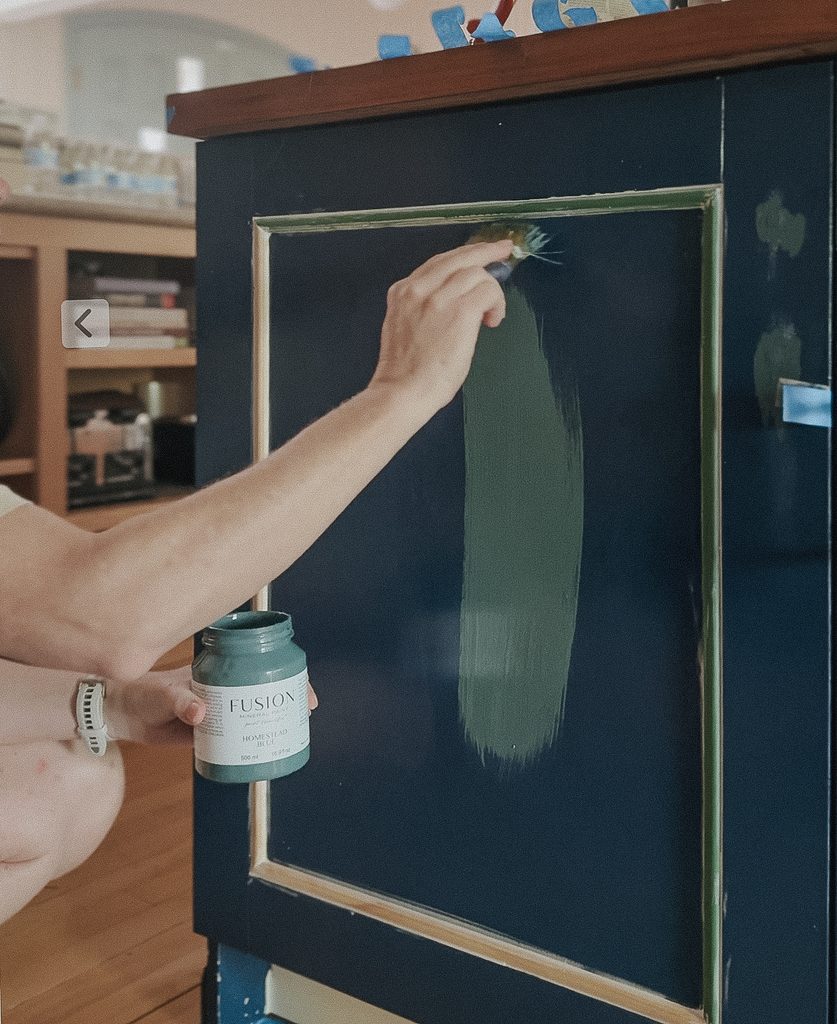
For the paint, I went with Fusion Mineral Paint in Homestead Blue.
Which is hilarious, because I’m not entirely convinced this paint knows it’s supposed to be blue.
Depending on the lighting and the angle, it can look blue. But most of the time, it leans decidedly green.
I call it my chameleon color.
When I shared the finished island makeover on Instagram, practically everyone commented about how much they loved the GREEN.
The color is literally called Homestead BLUE, people.
But that’s what I love about it.
It has that beautiful, muted, old-world feel I was hoping for, and it works so much better with all the vintage and layered details I’ve been adding to the kitchen.
Why I chose Fusion Mineral Paint
I’ve used Fusion Mineral Paint before, and one of the biggest reasons I keep coming back to it is how well it’s held up in our house.
Over three years ago, I painted the boys’ bathroom vanity directly over the existing oil-based paint.
And do you know what I did to prep it?
Wiped it down with water.
That’s it. LOL.
More than three years later, it hasn’t chipped or scratched once.
You can see that bathroom vanity makeover here.
Now, that doesn’t mean I’d recommend skipping proper prep on every project. Different surfaces and existing finishes can affect how well paint adheres.
And because our kitchen island gets a lot of daily use, I decided to give this one a little extra attention.
How I prepped and painted the island
First, I cleaned the cabinets with TSP to remove grease, grime, and buildup. I followed the cleaner’s directions and allowed everything to dry.
Then I applied Fusion’s Ultra Grip for extra adhesion.
Is Ultra Grip necessary for every project? No. But on a kitchen island that gets bumped, touched, and used constantly, I figured a little extra insurance couldn’t hurt.
After allowing the Ultra Grip to dry according to the product instructions, I painted the island with Homestead Blue.
And that’s another thing I love about Fusion. It’s designed for furniture and cabinetry, and I’ve had such good results with it in our home.
(Be sure to follow Fusion’s instructions for your particular surface, including any recommended drying and curing times.)
The hardware had to go too

Once the molding was on and the color started changing, the existing modern hardware looked even more out of place.
So I ordered vintage-style brass hardware from Amazon.
And, well, this is where my budget got a little interesting.
The hardware was $57. Oops!
More than three times what I spent on the molding.
But I loved it, and it added exactly the warmth and character I wanted.
Could you do this makeover with less expensive hardware? Absolutely.
You could even keep your existing hardware and still make a huge difference with the paint and molding alone.
Shop the hardware here.
How much did the kitchen island makeover cost?
| Supplies | Cost |
|---|---|
| Fusion Mineral Paint in Homestead Blue | $32 |
| Decorative molding | $15 |
| Vintage-style brass hardware | $57 |
| Fusion Ultra Grip (already owned) | $0 |
| Total spent | $104 |
I already had the Ultra Grip, wood glue, painter’s tape, and miter shears.
If you’re starting from scratch, a container of Ultra Grip is approximately $27, and miter shears generally cost around $18–$25. You’ll also need to account for any other supplies you don’t already own.
But here’s what I want you to notice.
The molding that completely changed the style of those modern Shaker doors cost just $15.
You don’t have to buy expensive hardware or replace your cabinet doors to make a difference.
How long did it take?
Almost two days.
But before you think this is some enormous weekend project, let me explain.
My dad was in town, I had work to do, and, well, life was life-ing.
If I’d been able to work uninterrupted, the hands-on portion probably could have been finished in a single day.
Of course, you’ll still want to allow the adhesive, paint, and any bonding products to dry and cure properly before putting everything back to regular use.
But the actual makeover was surprisingly easy.
I think this is one of my favorite things about decorating a home over time.
You don’t have to get everything right the first time.
I loved our navy island when we built it. It was exactly what I wanted back then.
But as I’ve started bringing more vintage pieces and personality into our home, I’ve realized that some things need to change right along with me.
And sometimes all it takes is a little paint, inexpensive molding, and a hardware swap to make something you already own feel completely different.
You don’t always need something new. Sometimes you just need to see what you already have a little differently.
And if you’re staring at modern Shaker cabinets wishing they had a little more character, maybe this will give you an idea or two.
No new cabinets required.
And no power tools, either.
Shop the supplies
- Fusion Mineral Paint, Homestead Blue
- Fusion Ultra Grip
- Decorative molding
- Miter shears
- Vintage-style brass cabinet hardware
Some links may be affiliate links, which means I may earn a small commission if you purchase through them, at no additional cost to you.
More DIY projects you might like
- My DIY pantry door makeover
- Guest bathroom makeover
- Watch the kitchen island transformation on Instagram