
What started as an 8 week makeover for the bi-annual One Room Challenge quickly became my favorite DIY project EVER. Yes. Ever. Why? Because not only am I ecstatic with how this room turned out, I tried new and potentially hard things that I had ZERO experience with—and it turned out to be not only NOT hard, but super fun!
Let‘s get into it…
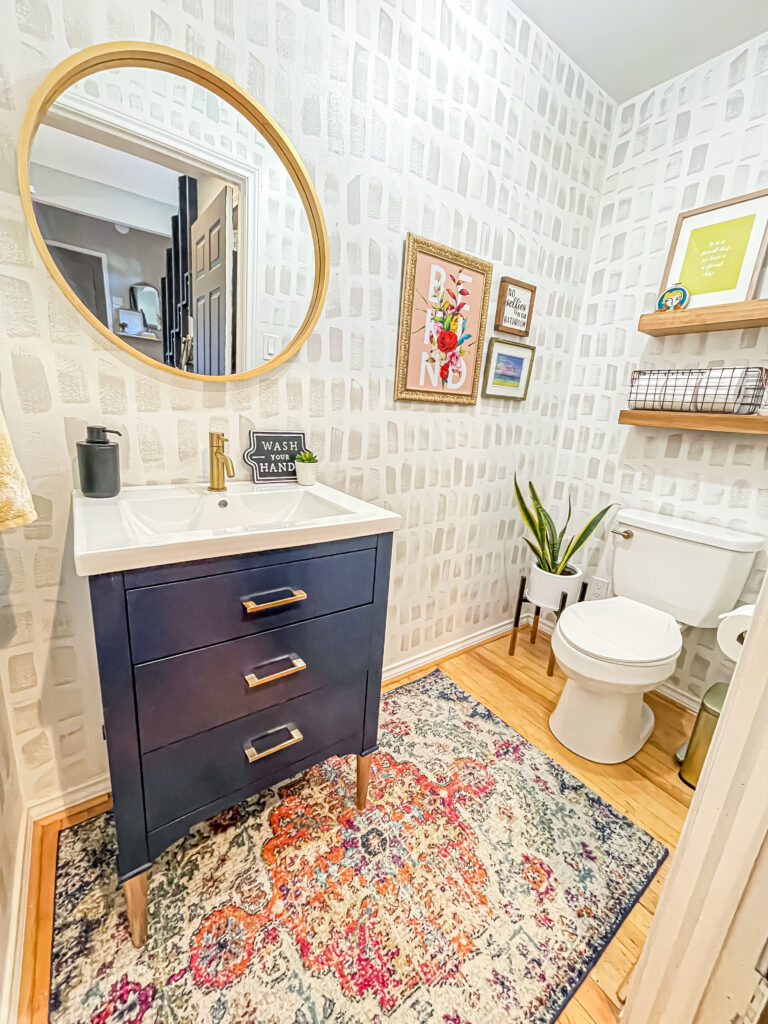
Where we started & why I wanted a change
Let me be clear. There was nothing wrong with this room. This is the room that actually spurred all my DIY room makeovers and also where I decided to share all my home and DIY transformations with all of you on this blog & on Instagram. It was the first room I DIYed by myself after we moved in. Since it is a half bath and the smallest room (besides the laundry room) in the house, I figured I could give it a glow up and see how it went. I saw this “trend” of painting strokes on a wall to look like wallpaper. Keep in mind this is a bit before my true home design journey began and I dived in to the home design world. I was an amateur—to put it nicely. I always had a passion for home decor, design and DIY.
Please also note I have the “how hard can it be” gene so I knew I could execute this wallpaper trend. And I did! I happened to film a little bit of it and share it on my personal Facebook page. I had such an overwhelming response that I posted it on my Instagram at 4009decorates—and my sharing journey began! Not bad, eh?
Like I said, there is/was nothing wrong with this room. But if you’ve been here long you know I’ve said it before…design tastes and styles evolve over time and I am no exception to this. Over the last few years I have grown to love and embrace more vintage, timeless design elements. I still like to combine those elements with some of the modern elements and furniture in our home, since I am not replacing my furniture (at least not right now!). Another great thing about timeless design styles such as vintage is that it blends well with almost any design style.
I have also really been obsessed with box moulding and millwork lately. It is such a classic and elegant look for not a lot of buck. And, again, since I have the “how hard could it be” gene I said: I am going to install box moulding and chair rail and gorgeous wallpaper in the half bath!
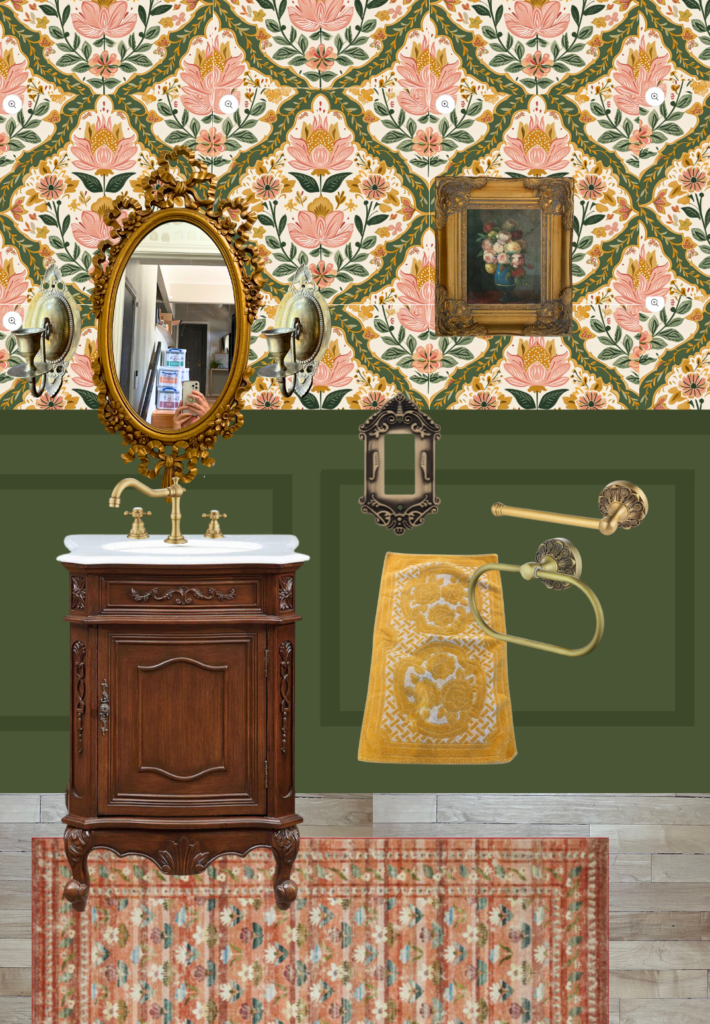
As with any room design, I begin with a mood board. It really helps see the textures, colors and ideas come together on a board to see how they work or don‘t work together. It also helps me choose things such as rugs, curtains, bedding, etc. If I put it together with all the elements on a mood board I can say: “Oh! That rug is all wrong!” or “Oh! That rug is perfect”, for example.
How I hung the best wallpaper ever!
I was scrolling Instagram one day and the wallpaper (above), Asher Lee by Painted Paper, came across my feed. I immediately knew that was what I would use in this room. It had all the colors I loved and the timeless style I was after. I also knew I did not want peel & stick wallpaper. Why? Let me tell you. I have only used and installed P & S the two times I have hung wallpaper in this house. And I can honestly say it is not easy. It makes me cuss, sweat and regret all my life choices. SO, there is that. In comes traditional paste wallpaper. The more I researched, read, and saw other DIYers do it in their homes on social media, the more I learned that it is the way to go. So I decided to go for it. I was always under the impression it was the harder paper to install, but whoa was I wrong. Dead wrong. I will never go back to any other wallpaper after installing this one.
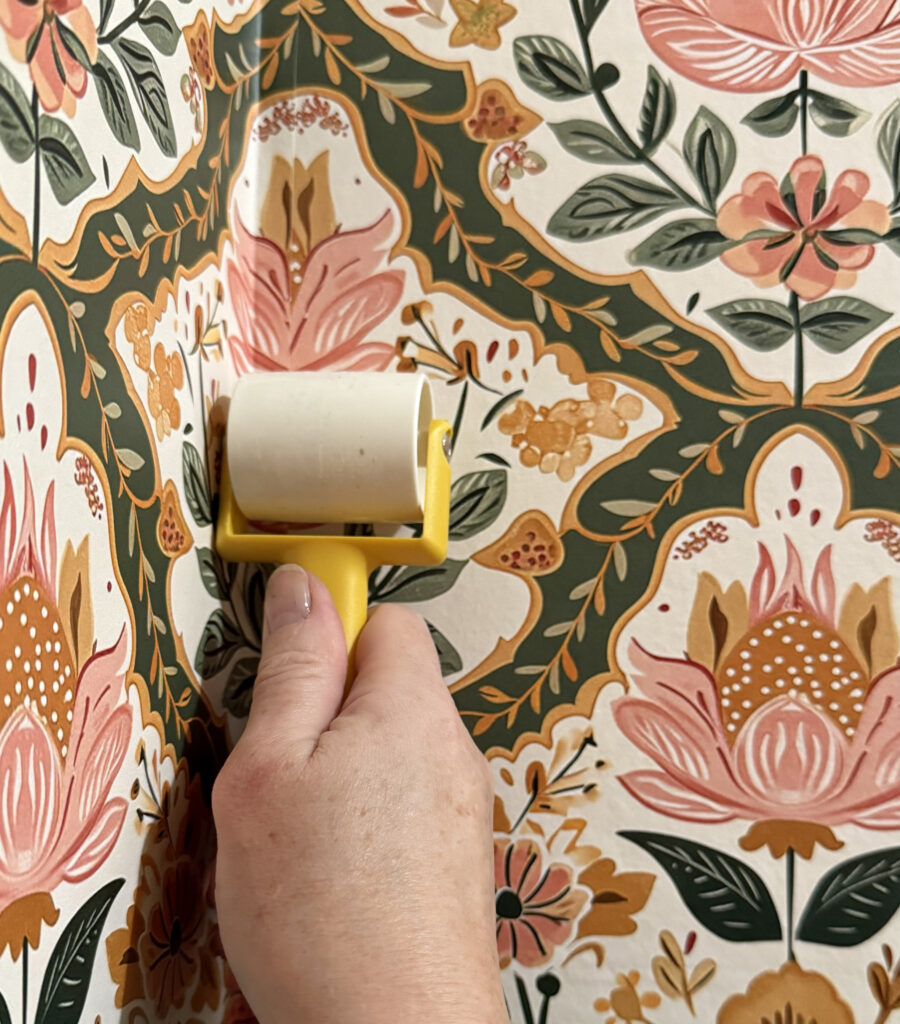
Here is a quick (and convincing) tutorial on installing traditional paste wallpaper. Measure, cut and then roll on ready-to-use paste to the back of your strip. Then fold each end on top of itself and let it set for 10 minutes. Since the paste has a high percentage of water in it, this makes the wallpaper expand so that it is at it‘s fullest. Here is a video of me showing you how:

I guess I need to add that you first need to measure your wall and draw plum lines or use a laser level, starting on the left most wall. No room is square, so you absolutely do not want to skip this step. I drew my first line vertically on the wall. This sets the line for how all the other panels will line up as well. Here is where paste wallpaper is better than P & S. If you don‘t line it up the first time, you can move it around and line it up for a good few minutes. It is very forgiving! With peel & stick if you have to line it up and re-line it up it stretches the paper and your design/pattern can and will be off. Ask me how I know.
To make the hanging process easy and seamless, I highly suggest buying this wallpaper tool kit. It is only $20 and worth every penny. The smoothing brush and the seam roller are a definite must-have. After you hang your panel use the smoothing brush and brush from the center outward to smooth out any bubbles and help it really adhere. After you hang your next panel use the seam roller to roll over those seams where they butt up to one another (or overlap, depending on your wallpaper instructions). It really seals the seams and presses them down to make sure they adhere. It is also satisfying because you can hear it adhering.
Use an Xacto knife to cut the excess from the ceiling and baseboard or chair rail. I highly suggest putting in a new blade after each panel. It may sound excessive, but trust me it makes all the difference in a clean cut with no rips in the wallpaper. And that my friends, is a crash course in hanging paste wallpaper! Let me know if you have any questions! I am happy to help where I can.
Chair rail and box moulding
Now for the part I decided to do with zero, and I mean ZERO experience. Hanging chair rail and box moulding. Remember: how hard can it be? Duh. This DIY is actually pretty straighforward. When you have your room measurements cutting and hanging the box moulding is the easy part. The chair rail is super simple because it is a perfect horizontal line. I have a cordless nail gun and I highly suggest investing in one if you do projects—ever. For the trim on the box moulding you can use a brad nailer so it won‘t split the wood since it is smaller. To choose which trim to use is 100% a personal choice. My suggestion is go the hardware store and look at all the different trims. There are so many to choose from. Same for chair railing. I chose what I personally liked. Nothing more than that.
I marked the wall where my boxes would go and then measured and cut the trim for the box. If you don‘t have a miter saw you can use a miter box and a hand saw. But I highly suggest a miter saw. Super quick and easy. They seem intimidating but I promise they aren’t once you use them. Measure each end and cut a 45º inside angle. Once you set your trim on the wall you will want to set a level on top of it to make sure it is perfectly straight. Then nail it on! Be sure to put a little piece of painters tape where your studs are so you can nail there for extra security. Once you are all done caulk all holes and edges for a seamless look.
Paint
I found an amazing device—the Datacolor Reader EZ—to find a paint color when trying to match it to a certain color (in wallpaper in my case) or if you have a painted wall and don’t have extra paint but need to match/find the paint color. It is a little pricey, but if you try to find or match paint colors often it is totally worth it! Download the ColorReader app and use your little Datacolor Reader EZ to find the perfect match. Set the device on top of the color you want to match. I set it on the dark green in the wallpaper. Click the button and it syncs to the app and brings up all the paint colors. You can adjust the settings in the app to which paint brands you want. I set mine to Behr because that is the only paint I use. So all the matches popped up with Behr matches. So easy!
Finishing touches
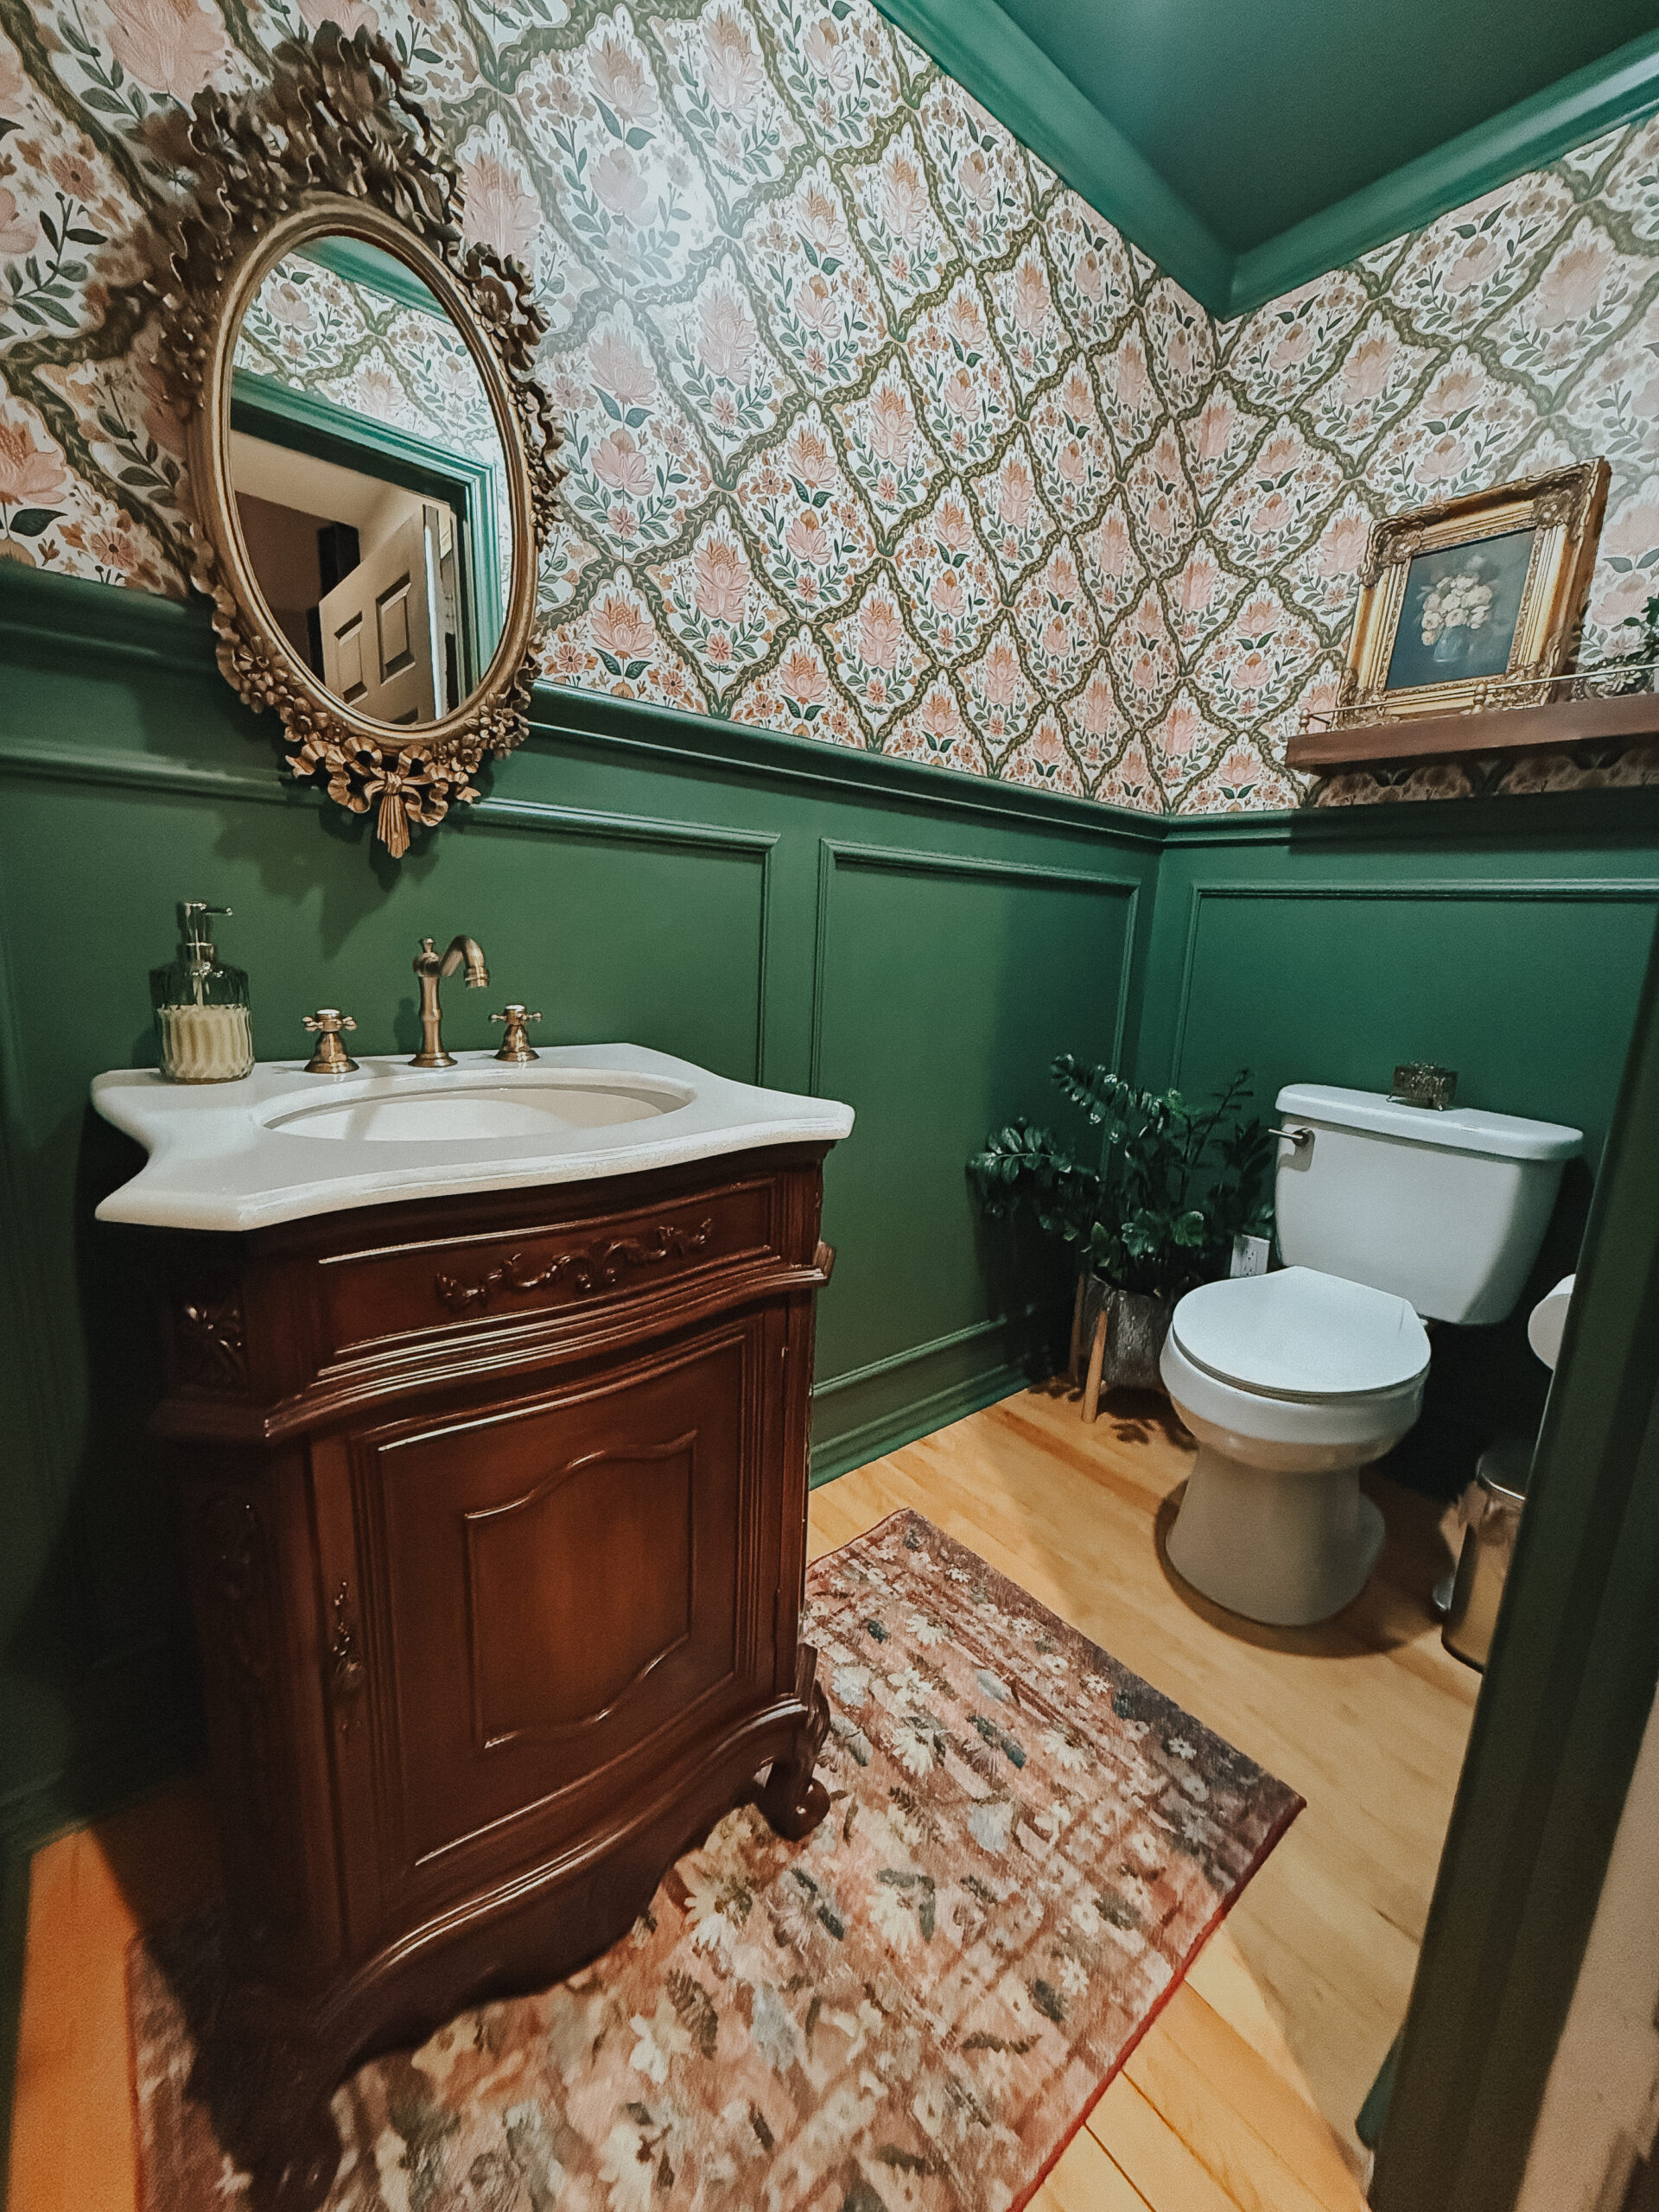
After all the millwork was done and I caulked and painted it all, it was time for all the finishing touches. I wanted to add a gallery rail on my floating shelf but after pricing them out I quickly decided to DIY it! You can see that tutorial here.
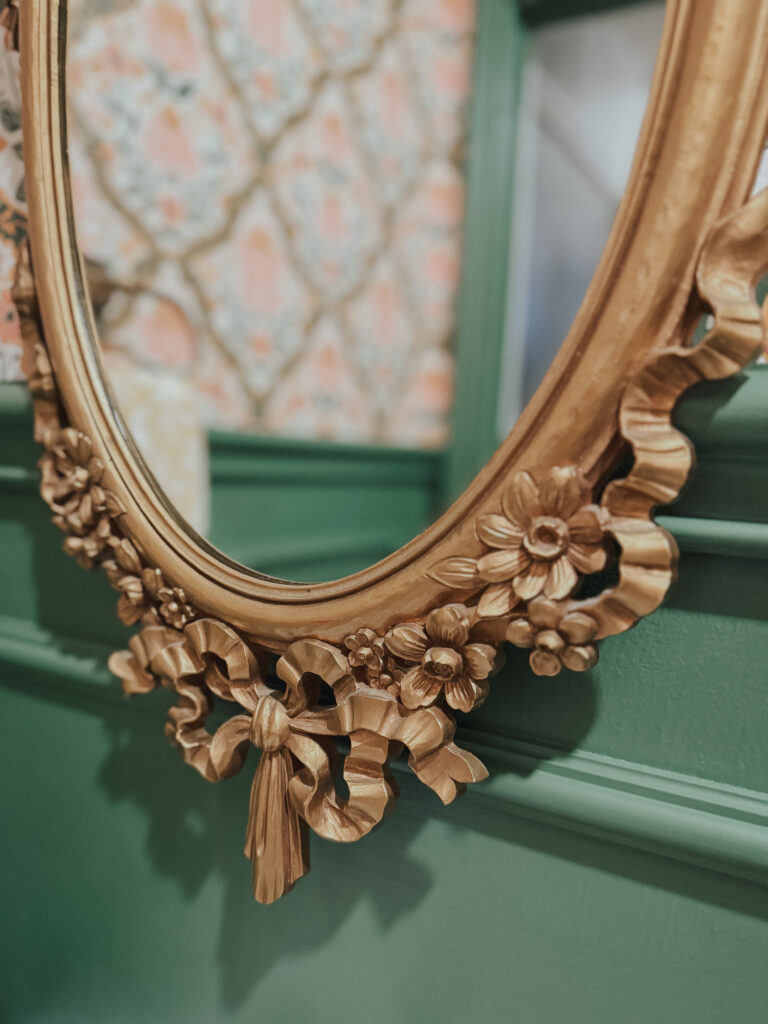
I decided to only use one of my floating shelves since the artwork I used was so tall. I found this art on etsy and I am super in love with it. The little flower oval piece next to it was an estate sale find and the faux plant {similar} is from Target. To keep with the timeless, brass and vintage feel I bought an antique light switch plate cover and plug covers. The mirror and vanity were FBMP finds. It’s all in the details!
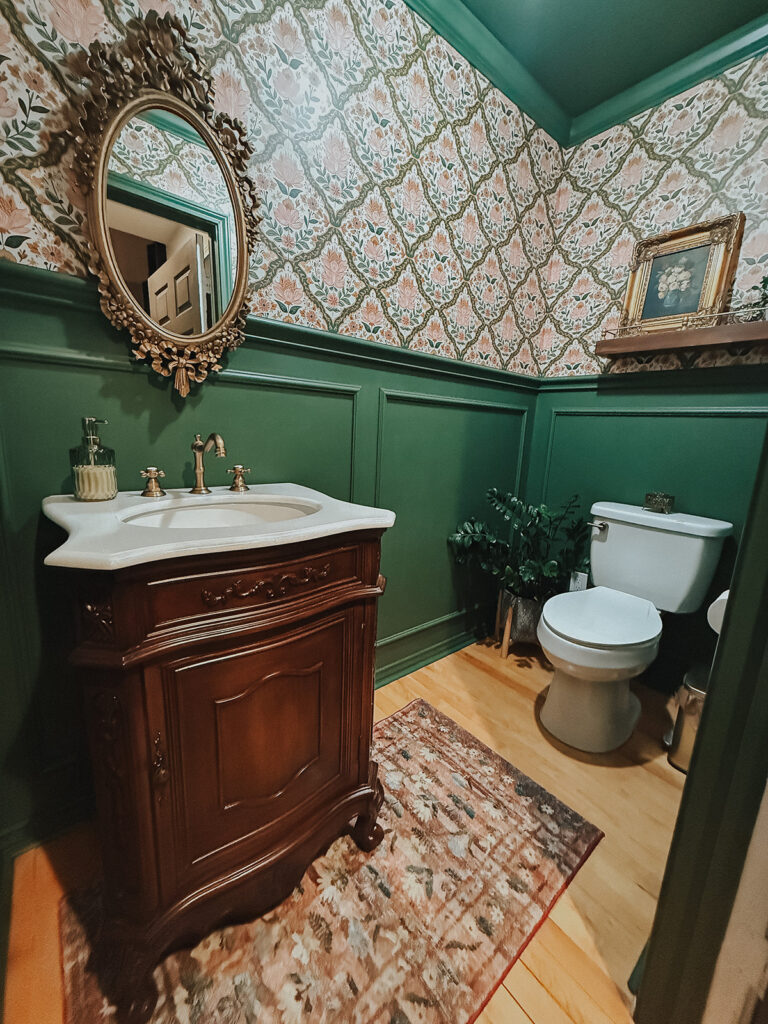
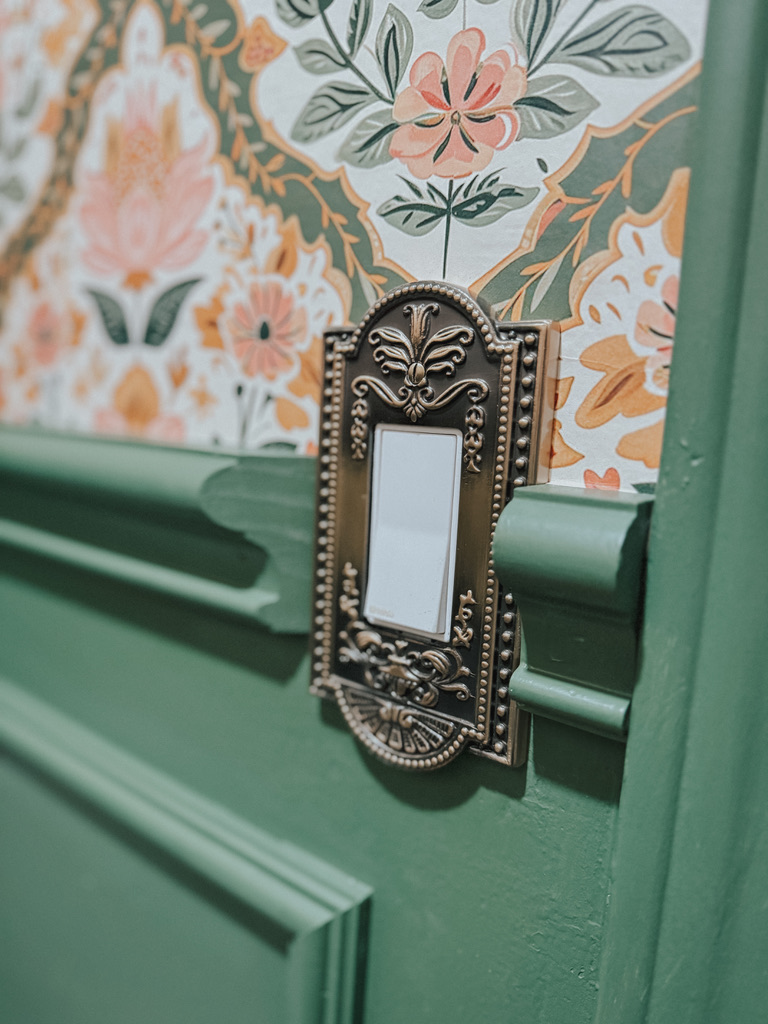
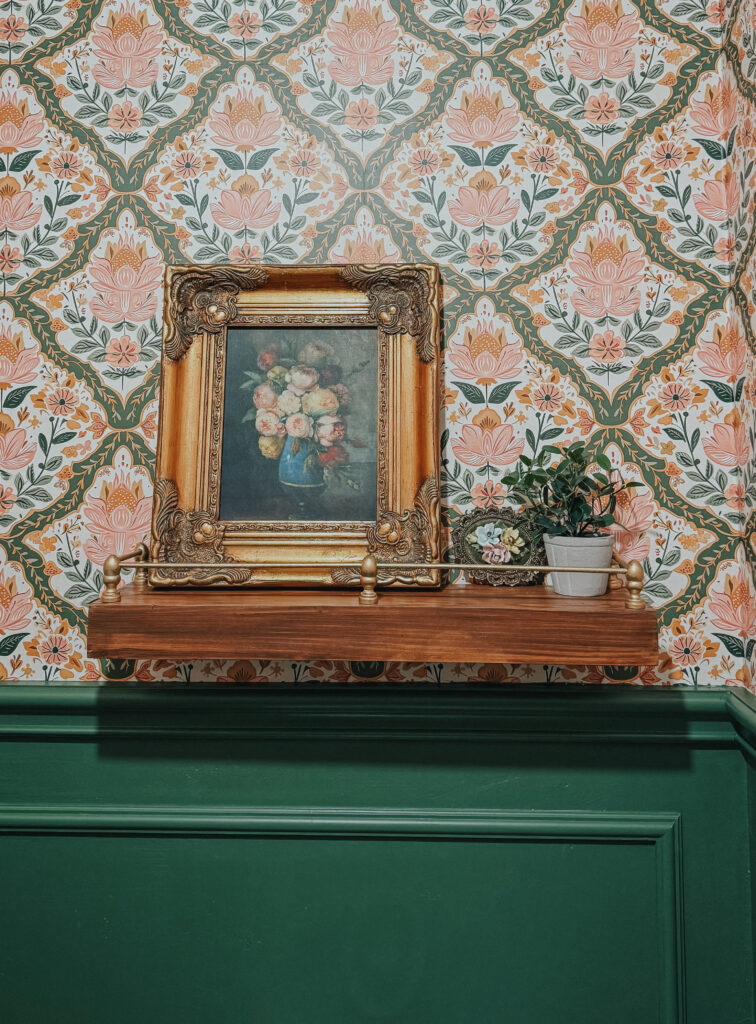
Floating shelf | Art | Faux plant | Switch plate | Faucet | Vanity | gallery rail shelf
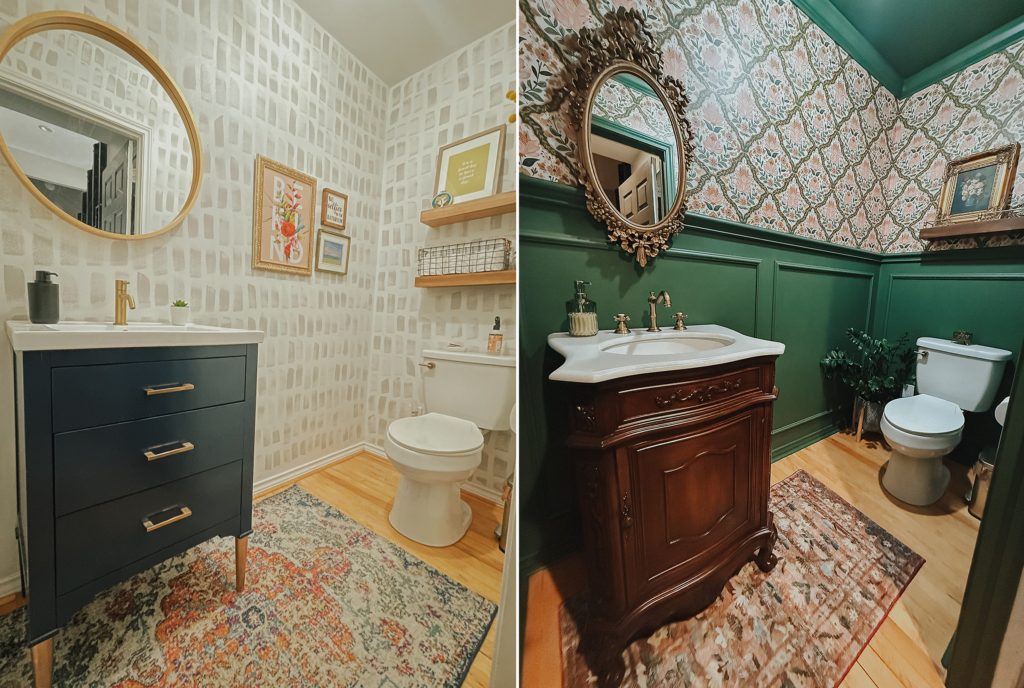
Before/After
And now for the reveal! What do you think?!! What part is your favorite? Do you prefer the cooler, lighter room or the moody vintage vibe? I definitely love the moody and charming vibe.